
Whatever the site you have (e-commerce site, blog,...), A/B testing is very important. Thanks to this analysis technique, you can collect valuable data that will give you a better idea of the preferences and requirements of your visitors and customers. You can also measure the impact of different variants of the same element. As a result, you will inevitably be one step ahead of your competitors! Do you want to learn more?
What is A/B testing?
Still called A/B testing or split testing, A/B testing is a test that puts two elements of a page " face to face ". In the end, this test shows which elements make customers more receptive. As an example, let's say you need to test a headline. You could create two similar pages with different titles. You will then direct traffic to each of the two pages. In doing so, you will be able to see which of the two titles leads to more time spent on the page, more views, a better conversion rate, more sales or leads, a better bounce rate, ...
A/B Testing is therefore effective in the sense that it allows you to have a clear and very precise idea of how your users react to the different elements of a page.
For example, you can test calls to action (CTA), page titles, subtitles, content, widgets, landing pages, themes, etc.
What are the tools for A/B testing on WordPress?
There are indeed a large number of powerful tools for A/B testing. They are notably :
- Nelio A/B Test;
- Google Optimize;
- Thrive Headline Optimizer;
- WordPress Call to Action;
- Split Hero;
- WordPress Landing Pages;
- Simple Page Tester;
- Title Experiments ;
- A/B Press Optimizer;
- Marketing Optimizer.
Use the Nelio A/B Testing plugin to set up an A/B test on WordPress

Nelio A/B Testing is a WordPress extension that you can access for free. A/B testing on WordPress is done in six steps that we will examine in detail.
First step: install the "Nelio A/B Testing" extension
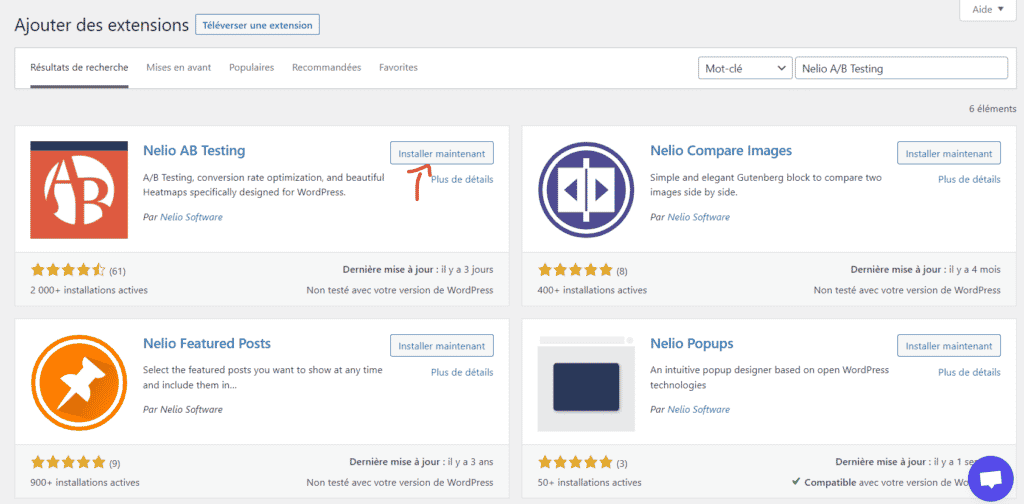
The first step to do A/B testing on WordPress with Nelio A/B Testing is to install the extension. You must do it from the extension library of the WordPress site. Here is how you will proceed:
1. Log into your WordPress administration;
2. In the menu on the left, click on the " Extensions " tab, then on "Add";
3. You will see a search bar in the upper right corner. Enter the name of the extension in this bar: Nelio A/B Testing;
4. As soon as you find the Nelio A/B Testing extension, click on "Install now". You will then confirm your choice by clicking on the "OK" button. After that, a "Nowinstalling" message will appear. You have to wait a few seconds;
5. Once the installation is complete, at the bottom left, click on " Activate Extension ". From there, your Nelio A/B Testing extension is activated on your WordPress site.
After activating the extension, a configuration page will be available to you, in order to set up Nelio A/B Testing. First, you have to accept their privacy policy and terms of use. After that you can actually start using the extension for A/B testing.
Step 2: Create a first-ever A/B test
The objective of installing the Nelio A/B Testing plug-in is to perform A/B testing. So this second step will allow you to perform a first test.
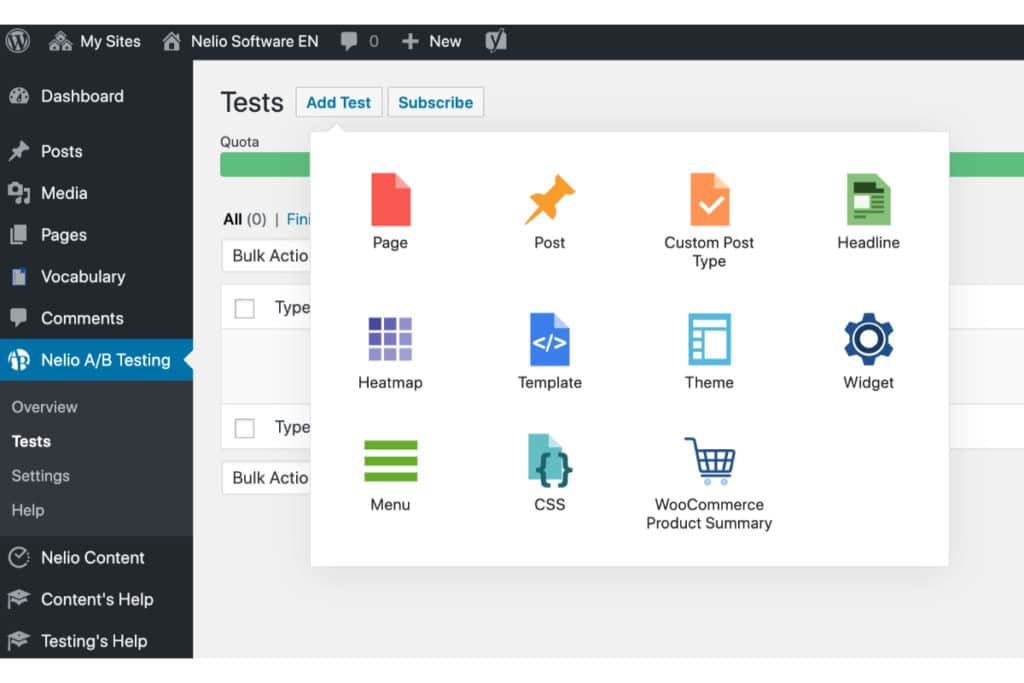
After accepting the privacy policy and the terms of use, you must press "Continue" to proceed with the creation. Once you have created your tests and you want to see them or create new ones, it is very simple. You just have to click on the "See my tests" button. This button is located under the current quota of your free Neolio subscription.
To come back to the creation, at the top left of the interface, you must click on "Add Test". Then, you must select the item on which you want to produce the test. It should be noted that when you are only using the free version of Neolio, you are only allowed to select two items: Heatmap or Page. In the Pro version of the extension, you will have the possibility to unlock other types of elements. For example, you will be able to do A/B testing on an entire theme, an article, a menu or on a custom code.
Step 3: A/B test setup
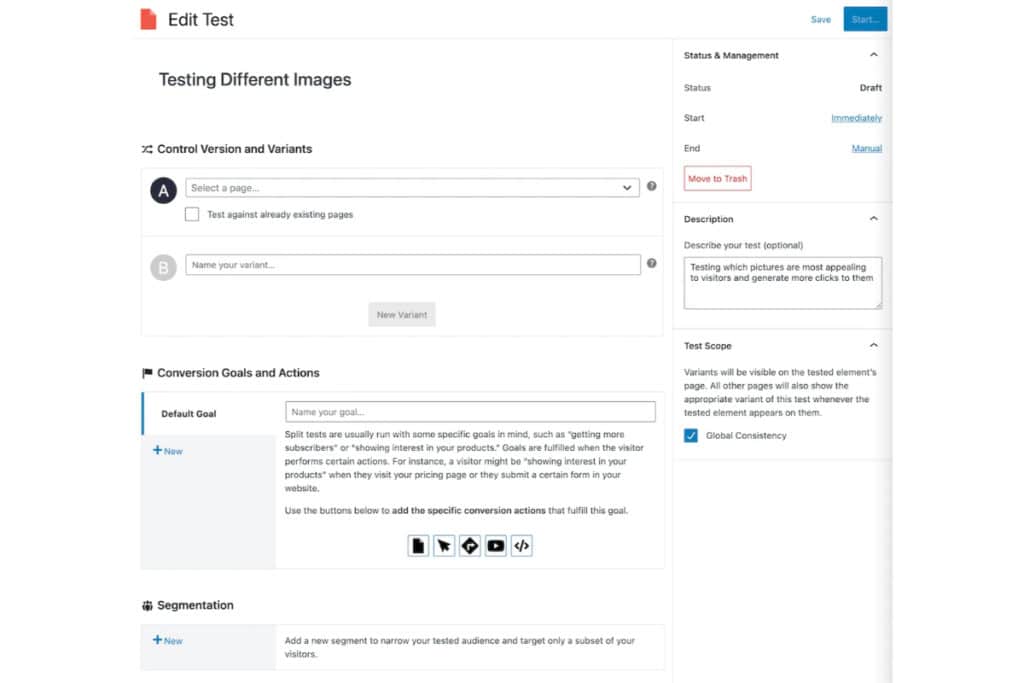
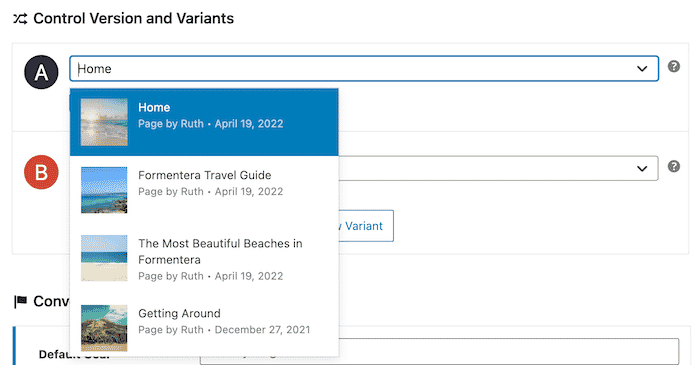
To configure the A/B test, go to the creation interface. You will start by entering the name of the test. Don't worry, you can enter any name you want. Then, choose the page of your WordPress site on which you want to perform the test, from the list of pages in the field.
The third phase will consist of giving a name to the variant. This variant will be in fact another version of the page that you will have previously selected and that will be specially created for the test. Because, as you may recall, A/B testing allows you to compare two or more variants of the same element in order to determine which one performs better. And this is how you configure an A/B test.
Step 4: Modification of the A/B test variant
In order for the test to be effective and valid, it is essential that you modify the different variants that you have added to your test. At the beginning, the variants are just copies of the item you selected during the configuration. This is a default configuration. It will now be up to you to modify these variants.
So how do you do it? Simply position the mouse under the variant name field. Two actions will appear: "Preview" and "Edit". Then click on "Edit" to modify the selected variant, in order to transform it into a different version of the element selected at the beginning.
For this reason, the extension will redirect you to theWordPress editor so that you can let your creativity run free. Furthermore, don't forget to save the changes you've made. All you have to do is click on " Save Draft" .
Fifth step: setting the A/B Testing objective
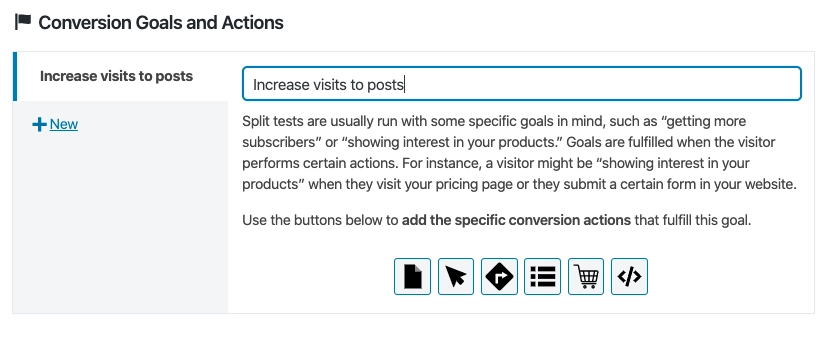
Once you've made the changes, you need to go down a little further in the settings to the A/B test. There is a section called "Conversion Goals and Actions". You now need to give your A/B testing goal a name. You will then have to select one of the four types of goals that will be suggested to you. These four objectives are as follows:
- Page view: here, each time a visitor or prospect sees the tested page, a new conversion will occur. It will be up to you to choose a content type. It could be an article or a page. You must also choose the content that will be tested;
- Click: As soon as a visitor clicks on a given HTML element from an element identifier or CSS selector, a new conversion will take place. So you will have to decide on the appropriate test method (HTML element identifier or CSS selector). Then you have to enter its value ;
- Click external link: for this objective, each time a visitor clicks on a particular link, there will be a new conversion. You must therefore indicate the link or links that must be supported for conversion;
- Custom event: this one allows you to produce conversions according to a JavaScript code that you have to create.
For example, if you choose the "Click" objective for the A/B testing of one of the pages of your e-commerce site. The test will target all the HTML elements of the page, with a CSS selector that will be of the same class as your add to cart buttons.
Step 6: Start the A/B test
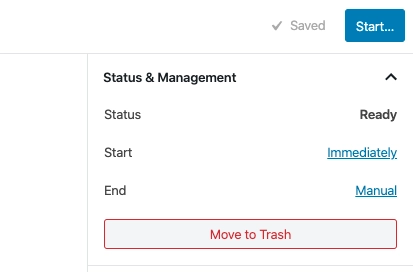
We're in the final stage of the process of performing A/B testing on WordPress with Nelio A/B Testing. On the right and top of the Neolio test creation interface, you will see the " start " button. Click on it to start the A/B test.
As for the progress and results of the A/B test, you can follow them directly in the extension. The latter provides you with several graphical and statistical interfaces so that you can better interpret the results obtained.
In addition, in the " Nelio A/B Testing > Tests " tab, you will be able to access all your tests. But what's even better is that you have the ability to stop or pause a test. Just click on the " Stop " and " Pause " buttons, which are located in the dashboard of the test in question.
Using Google Optimize to run an A/B test on WordPress

Google Optimize is also part of the A/B Testing tools. In fact, it is a free tool that will allow you to efficiently learn the basics of A/B testing. It is true that it is not directly connected to WordPress, but it has a link to Google Analytics, and you will only need to configure it in WordPress to use it. Let's take a look at how you can use Google Optimize to run an A/B test on WordPress.
Configure Google Optimize in WordPress
Before you can use Google Optimize to perform A/B testing, you need to configure it in WordPress. Here's how to do it:
1. Start by going to Google Optimize and create a free account. To do so, you will have to click on the "Get Started" button. We advise you to use your email address which is linked to your Google Analytics account;

2. This is to link your Google Analytics property. On the page on the right, you must click on " Link Property" ;
3. This previous action will allow you to see your Google Analytics property. If however several properties are linked to your Gmail account, choose the one you think is best to be used with your Google Optimize. Then click on " Link ";
4. Here you must click on " Get Snippet ";
5. You must now proceed to modify your Google Analytics code on your WordPress site, using your Google Optimize container ID;
6. Click on " Done ". Your WordPress site can be used with Google Optimize.
Do WordPress AB Testing with Google Optimize
You will certainly find this part even more interesting, as we present you how you should go about doing your first A/B test with Google Optimize on your WordPress site.
First step: initiating the A/B test
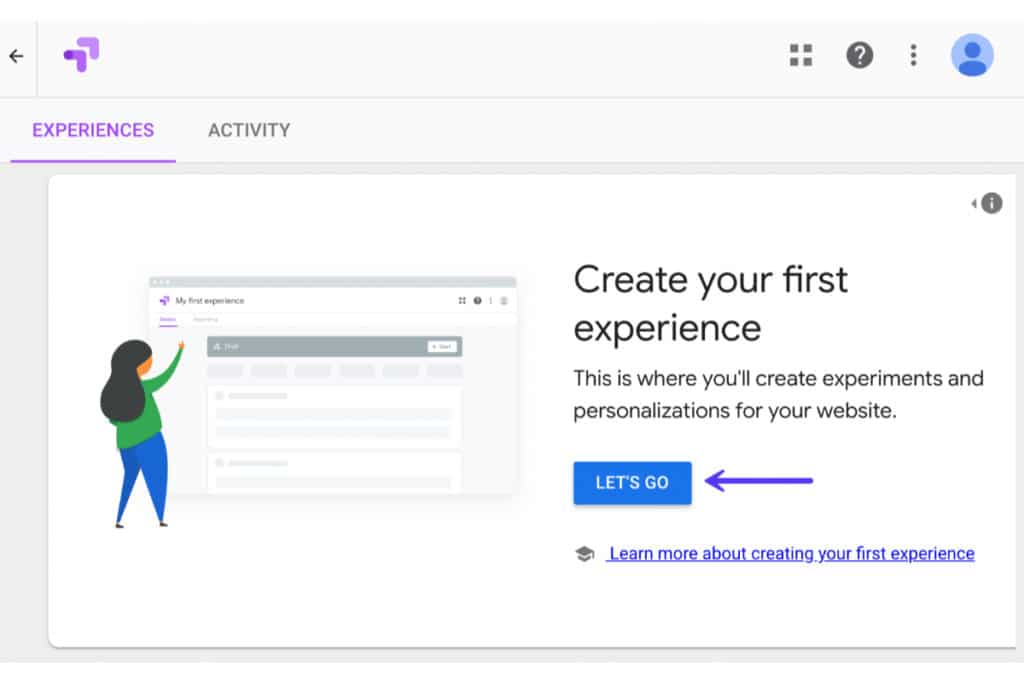
To create your new test, also known as an experiment, click on "Let's Go" on the Google Optimize dashboard.
Second step: creating the A/B test
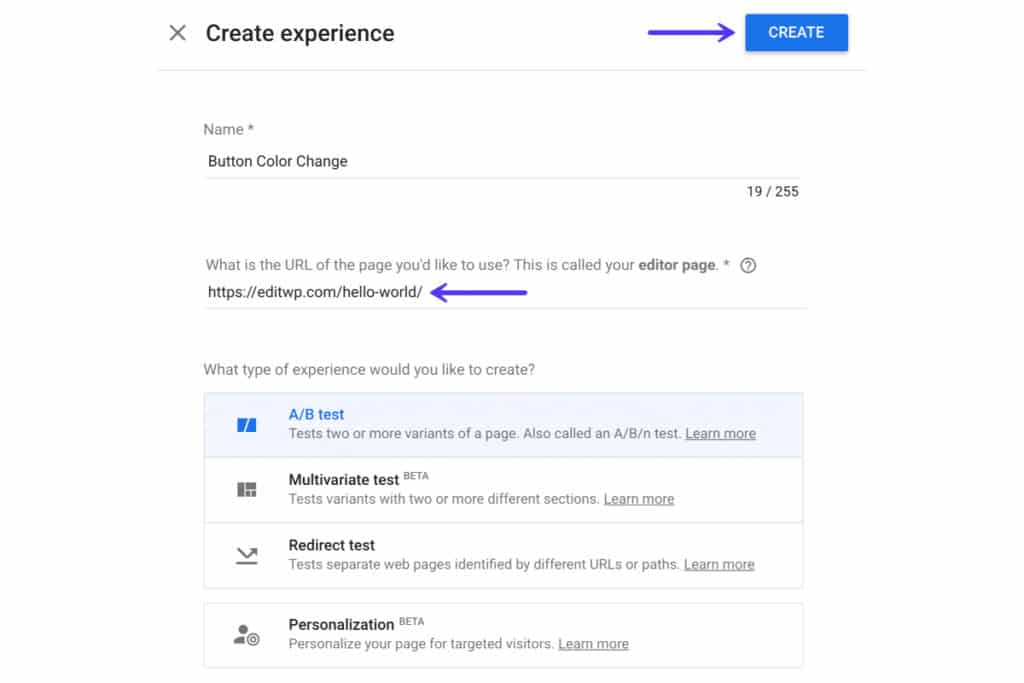
This step is the A/B test configuration. Let's take the case where you want to perform a simple A/B test to change the color of a Call-to-Action button. Before continuing, it is necessary to specify that all CSS or HTML elements of your WordPress website can be modified in Google Optimize.
Coming back to the A/B test in regards to changing the color of the CTA button, you first need to choose a name for your test. Then you need to fill in the URL where you want to edit the code for the A/B test. In the "experiment type" section, you must choose the type of experiment. Finally, click on "create".
Moreover, in addition to A/B testing, Google Optimize allows you to perform other types of tests, which could be greatly useful to your website. These are multivariate tests, redirect tests and personalization tests.
Third step: creation of variants
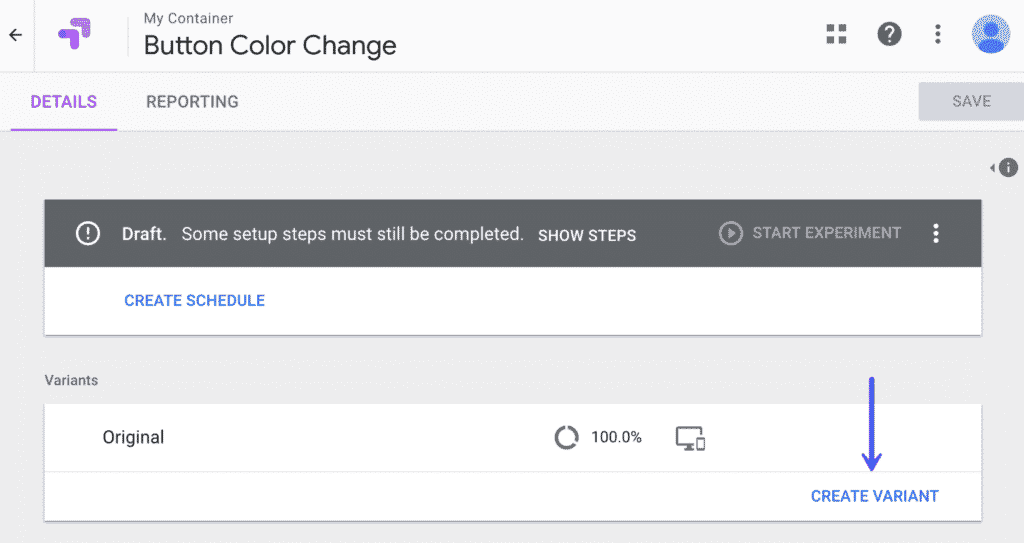
At this stage, the editor page you have previously chosen for the experiment will be used by Google Optimize as the original variant. What you will have to do next is to create another variant, by clicking on " Create variant" . Then give it a name, which you can easily recognize later. If we take the case of changing the CTA button, you can name this variant "red button" for example. The variants of the original CTA button must be different. Then click on "Done".
Step 4: Modification of the variant
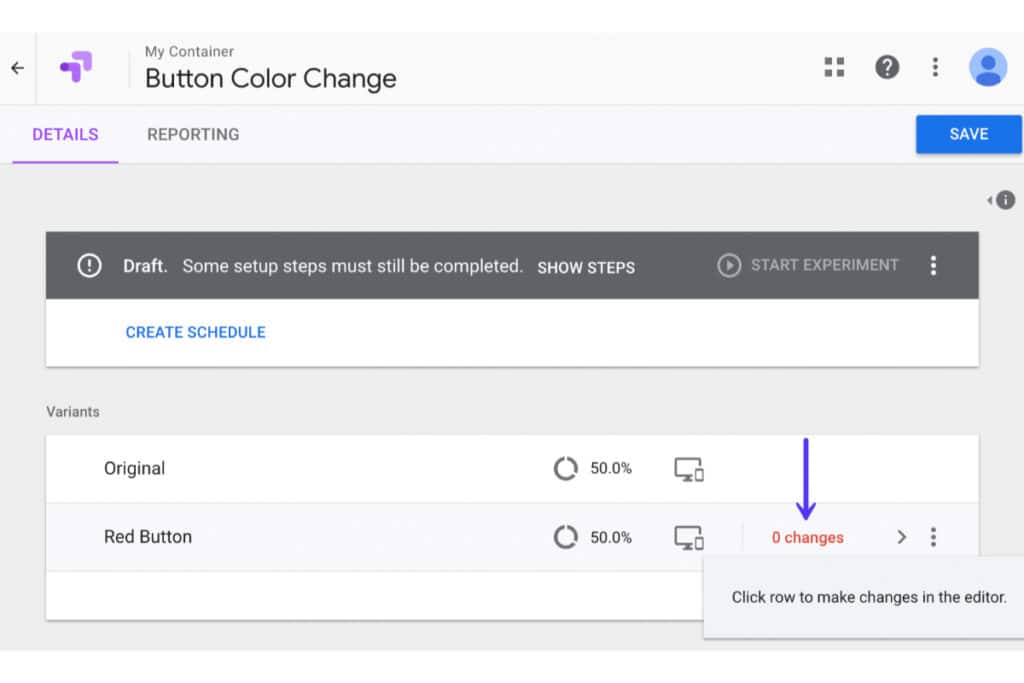
Similar to the Nelio tool, you also need to edit the created variant. Because as you can imagine, the created variant will be a perfect copy of the initial one. Then you will see "0 changes" written in red . Click on this button to make the desired changes to the variant of the initial element.
As for the editor in which you will make the changes, you will certainly be offered to use the Google Chrome extension. But to enjoy an excellent previewing and editing experience, we recommend that you install the free Google Chrome Optimize extension on your site. This software is incredibly powerful. By installing it, you will be able to make any kind of changes on your pages.
Fifth step: defining the objective of A/B testing
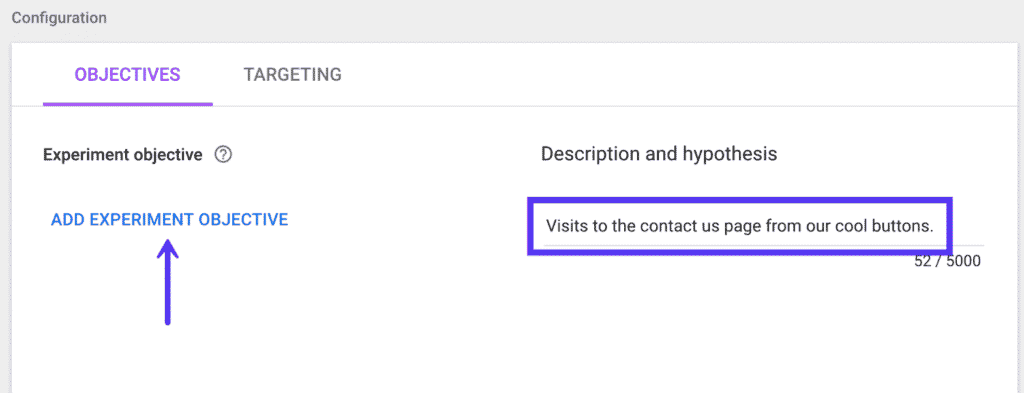
At this stage, you need to define your objective, in other words, what you want to test. You will notice that the traffic distribution target will be set to 50%. This percentage is set by default but you can leave it that way. Next, you will give a concise description of your objective.
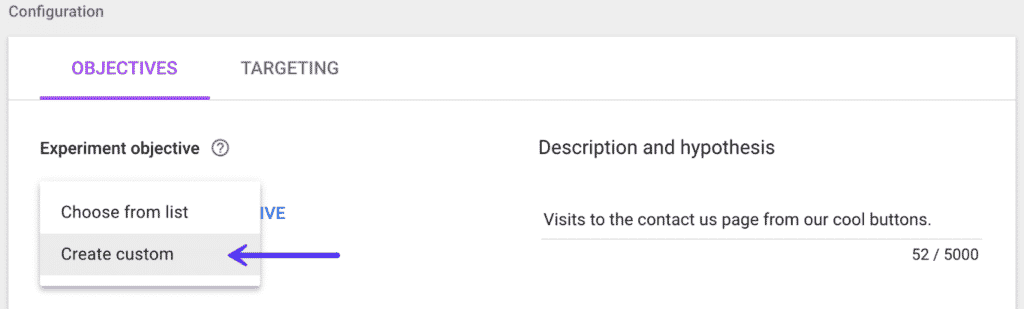
This way, later on, you will easily remember why you chose this goal. This part is especially useful because A/B tests can last for months. By adding something you can remember at another time, you will find yourself more quickly. After defining your objective, click on "Add an experience objective".
Step 6: Link your goals in Google Analytics to your goals in Google Optimize
If you were using Google Analytics and linked your account to Google Optimize, you can also link your Google Analytics goals here. In fact, as a business, if you're already using Google, you probably have form goals, conversion goals, online business tracking goals, and more. So Google Optimize gives you the ability to link these different goals to your A/B testing on WordPress.
But this is not mandatory! You can of course define custom objectives for your A/B testing.
Last step: start A/B testing
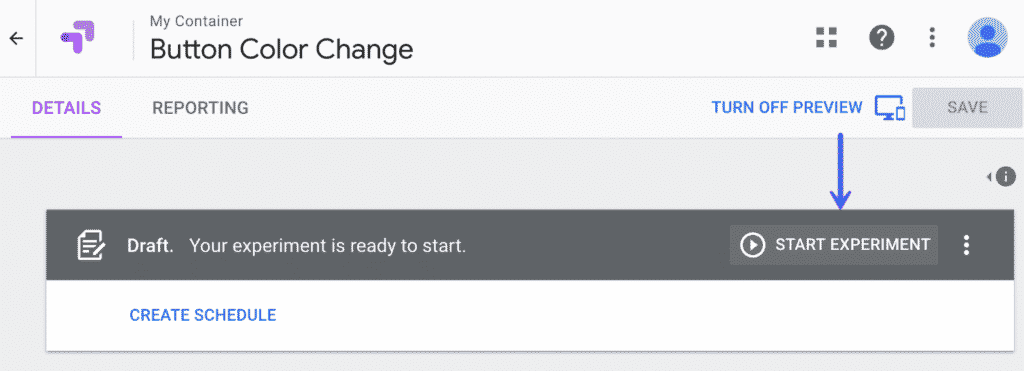
Well, you are now ready to start your test on WordPress. After saving all your actions, click on " Start Experiment ". This way, at the location you specified in the test, the traffic will start to be tested. In addition, you will also be able to test with site-wide targeting preferences.
From there, Google Optimize will do its job and you can watch. Usually, these tests on Google Optimize take one or two weeks. At the end, you will know which variant has provided the best results. Google Optimize is free but very powerful with highly effective features. Track transaction data, page views, revenue generated by a change in color, button, etc., with A/B Testing with Google Optimize.
A/B Testing on Wordpress: in summary
Nelio A/B Testing is a WordPress extension that will allow you to get clear, safe and reliable results. From these results, you can determine which version works best for a given element of your WordPress site. As for Google Optimize, it is also effective and allows you to know the preferences of your site visitors. Once you've started, you won't be able to do without A/B testing.