Google Analytics (GA) is a high-performance tool designed for website owners. Its purpose is to analyze visitor behavior. The tool has more than one trick up its sleeve. It monitors and tracks your audience’s movements. It improves your customer acquisition strategy. It helps you develop your conversion techniques. In addition, this analytics tool optimizes the user experience. As a result, it’s an essential part of any behavioral analysis approach. “How to Install Google Analytics on WordPress: A Step-by-Step Guide” reveals the secrets to integrating it into your site.
Step 1: Create a Google Analytics account
Creating a Google Analytics account starts the setup process.
Visit the official Google Analytics website
Google Analytics is a tracking tool. While in its early days it was simply a JavaScript code embedded in certain pages, it has since evolved into a full-fledged software program.
Its main function is to track your online traffic. This analysis will be used to estimate your revenue. Its main advantage is its accessibility. Using it requires no subscription or purchase.
The first step in setting it up is not complicated at all; it simply involves visiting the official Google Analytics website. You can also sign in to your Gmail account to open the Analytics tool.
Enter an account name and select the content type
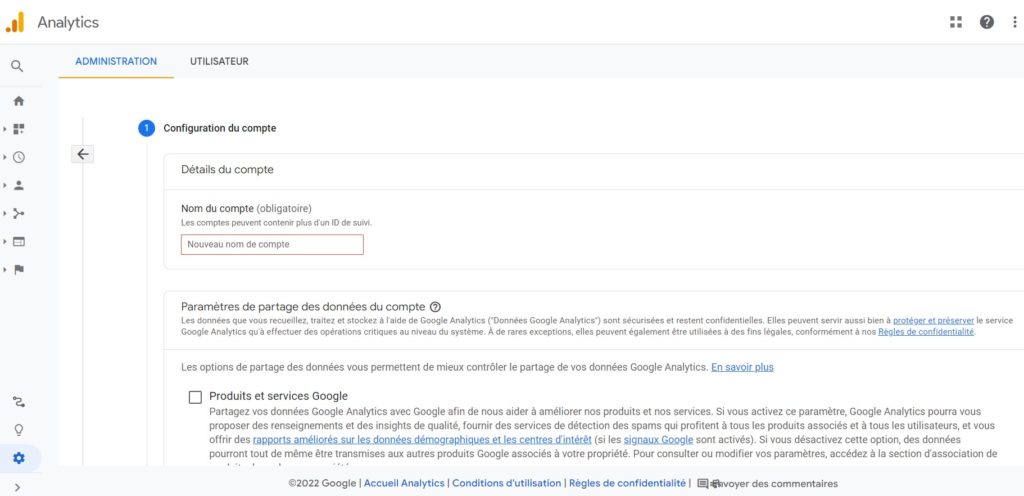
In the second step, you'll be asked to name your account something like "My Websites" or simply "My Sites." You can also take inspiration from your company's name.
Next, configure your privacy settings. Google Analytics has a strict privacy policy and does not disclose your statistics, your name, or your website to third parties. However, for benchmarking purposes, it does allow for the anonymous sharing of data with other websites in your niche. For marketing purposes, it also allows statistical data to be shared with your sales team.
Once you have defined the name and settings, check the boxes for "Google Products and Services" and "Benchmarking."
Next, you 'll need to choose the type of content to analyze: digital application, website, mobile app, etc. Here, you'll select the default option, which is "web."
Fill in the website ownership information
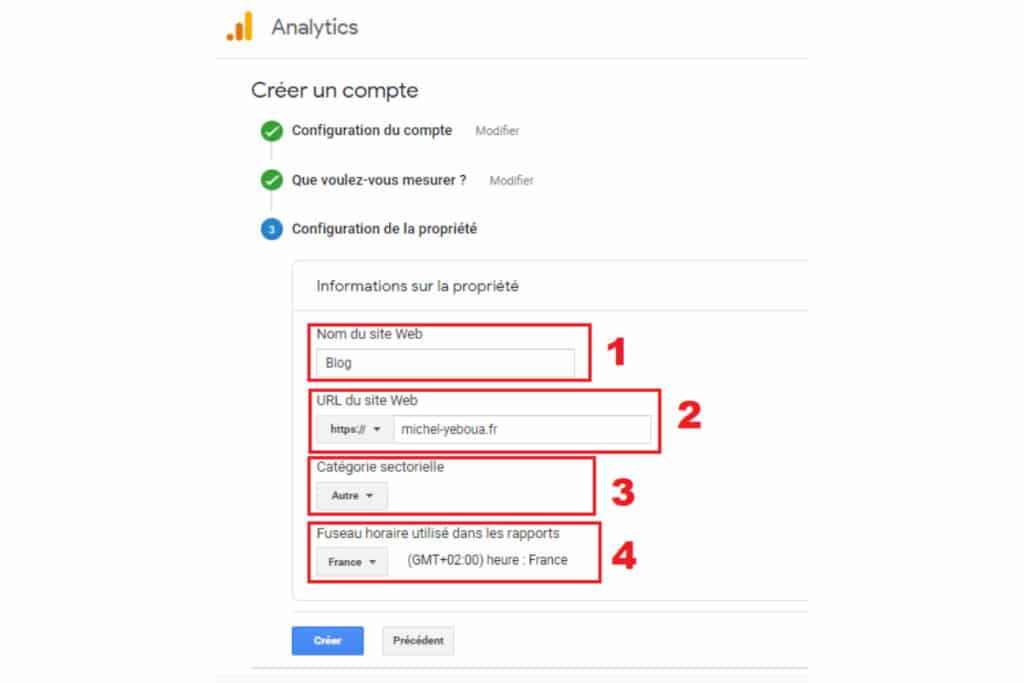
Enter the information about your website. Fill in the following fields:
- account name (enter any name you like);
- website name: the name defined earlier;
- the URL of your website;
- the industry category that corresponds to your online business;
- your time zone.
Defining the time zone requires special attention. An error could skew the timestamps of your data and compromise your overall analysis.
The process concludes with the required data protection notices. You can choose to read them in full before checking the box, or simply check the box at the bottom of the page.
Verify Your Google Analytics Account
Click the "Create" button to confirm your new Google Analytics account.
Google will then provide you with a piece of JavaScript code. This is your Google Analytics tracking code. You’ll need it when integrating GA into WordPress, so be sure to set it aside.
Your code looks like this:
<!-- Global site tag (gtag.js) - Google Analytics --> <script async src="https://www.googletagmanager.com/gtag/js?id=Votre ID de suivi"></script> <script> window.dataLayer = window.dataLayer || []; function gtag(){dataLayer.push(arguments);} gtag('js', new Date()); gtag('config', 'Votre ID de suivi'); </script> And so the first part of the installation comes to an end.
Step 2: Integrate Google Analytics into Your WordPress Site
There are several ways to integrate Google Analytics into your WordPress site.
Method 1: Use a plug-in
The first tip is incredibly simple: it involves using a plugin, such as Sit Kit by Google, MonsterInsights, or Google Analytics (GA).
Use the Site Kit by Google plugin
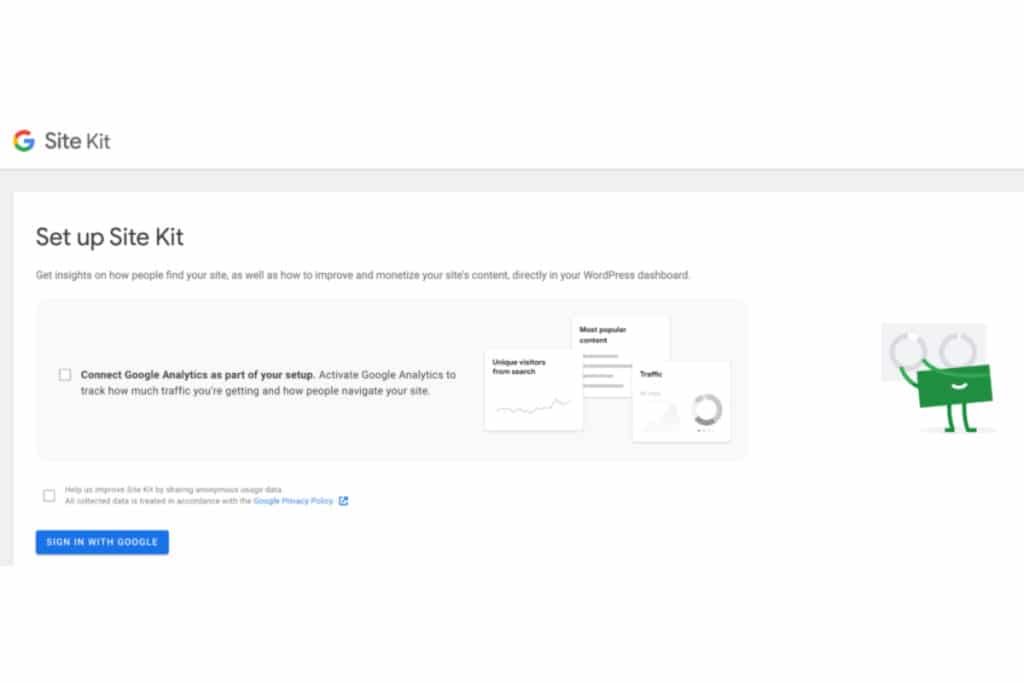
Google Site Kit is the official Google extension. In addition to being easy to use, the tool can integrate other software programs with your website, such as:
- Google Search Console (to check your site's search engine optimization);
- PageSpeed Insights (to highlight your site's performance);
- Google AdSense (to analyze your site's ad performance on Google).
To use it, you must first install it on your website. A pop-up window will appear to confirm that it has been activated.
Go to “Site Kit,” then “Dashboard.” The dashboard view in your back office confirms that the operation was successful.
Use the MonsterInsights plugin
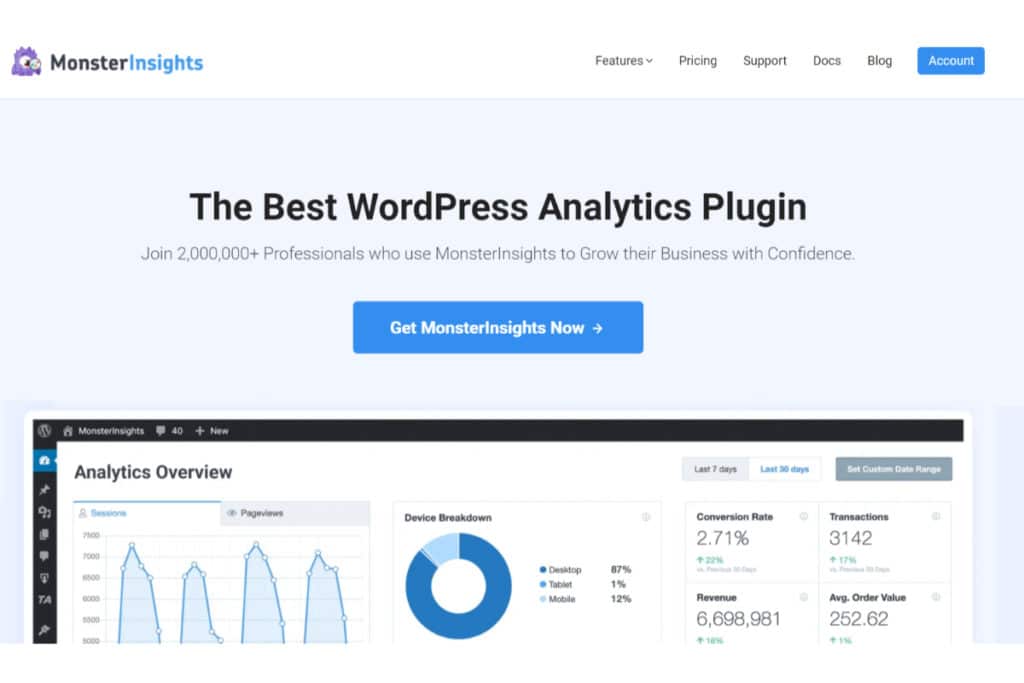
MonsterInsights ranks as the best Google Analytics plugin for WordPress. The software offers a freemium version and a pro version (for an annual subscription of approximately 190 euros).
The installation process consists of 4 steps:
- choosing the type of website: showcase site, e-commerce site, or blog;
- Signing in to MonsterInsights through your Google account;
- the account definition (your Google Analytics account);
- completion of the installation.
Configuration follows the installation and activation of the plug-in. Go to the "Reports" tab, which will display your dashboard, and configure the necessary settings.
Use the Google Analytics (GA) plug-in
Because of its simplicity, the GA Google Analytics extension remains the best option. To install it, you mustfirst add a property in Google Analytics. This property will centralize your website's data.
Next, retrievethe Google Analytics tracking ID associated with the newly created property. It consists of the prefix “G-” followed by 10 characters—a sequence of numbers and letters. You can find the tracking ID under “Administration,” then “Data Streams,” and finally “Property.” An easier way is to search for “tracking ID” in the search bar at the top of your screen.
Copy the code. Go to "Settings," then "Google Analytics" and "Plugin Settings," and paste the code into the configuration panel.
Method 2: Use a tracking code
The second method, which is more complex, involves manually adding a line of code to WordPress to integrate it with Google Analytics.
Get the tracking code
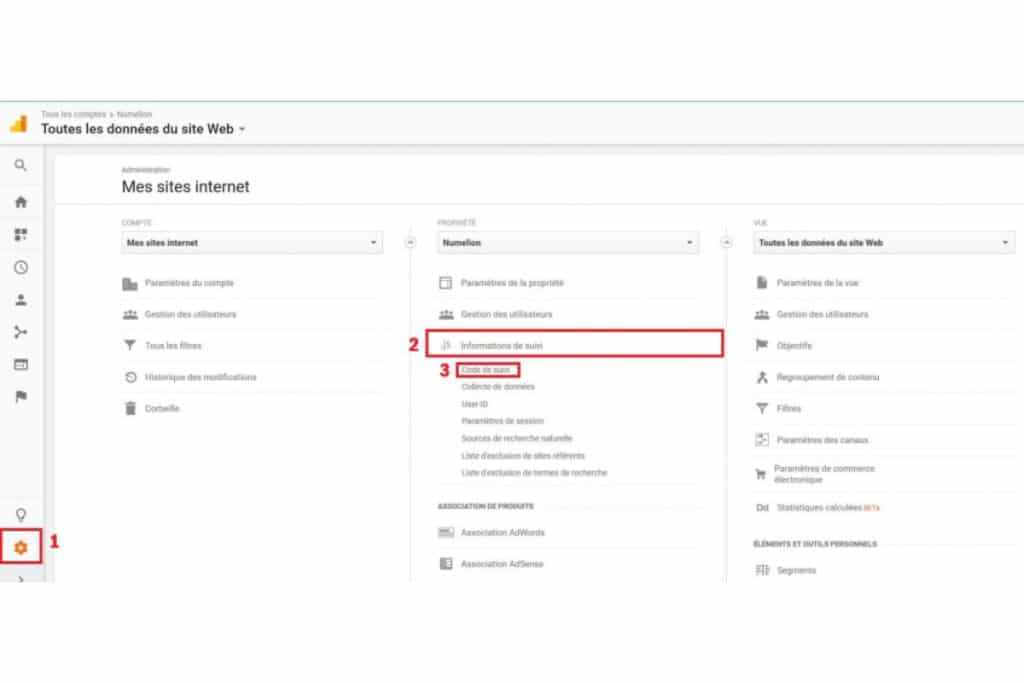
Also known as a tracking tag, the tracking code establishes the connection between your WordPress site and Google Analytics. If you lose the tracking code:
- Log in to your Google Analytics dashboard;
- Select the "Administration" tab;
- Go to the "Setup Wizard" tab;
- Next, select the “Tag Installation” tab;
- Click "Web," then click on your property;
- Select "Global Site Tag."
Your tracking code is similar to the GA tracking ID. It takes the form "G-XXXXXXXXXX."
Add the tracking code
Le code prend place dans la balise <head> du site web. Son incorporation vous conduit à une alternative entre l’ajout dans le thème enfant de votre site ou au moyen d’un plug-in WordPress. La première option s’applique au site web disposant d’un thème enfant actif. Pour rappel, il s’agit d’un template dépendant d’un autre template WordPress (le thème parent). L’ajout s’opère en 5 temps :
- Copy your code;
- Go to your dashboard;
- Go to the "Appearance" menu, then "Theme Editor";
- Edit the "Functions.php" file;
- Paste your tracking code into the tags.php file;
- Save your changes.
La seconde méthode s’applique à tous les plug-ins WordPress. Rendez-vous dans l’onglet « Réglages » du tableau de bord. Placez le code de suivi dans l’en-tête <head> et enregistrez.
Method 3: Use Google Tag Manager
Google Tag Manager centralizes and manages tags (Pinterest, Criteo, LinkedIn, etc.) for WordPress sites. It makes it easier to manage tags and saves you from having to make tedious changes to your site’s code. It also helps prevent coding errors.
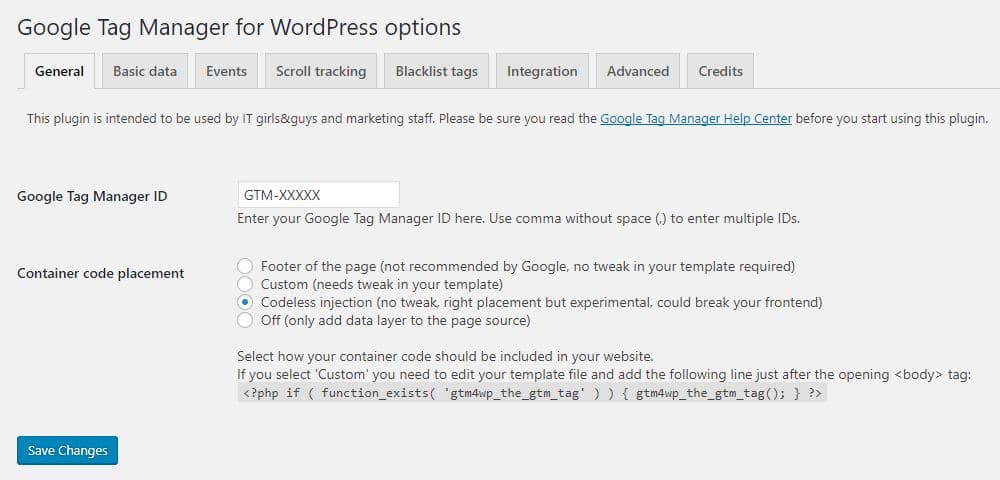
To use it, you need to install the Google Tag Manager for WordPress plugin and then create a Google Tag Manager account. The steps are similar to those for creating a Google Analytics account, with the exception of property creation. This time, create a “container” instead of a property.
Retrieve thecontainer ID from the "Admin" tab. It begins with the prefix "GTM-" followed by a series of numbers and letters.
Copy and paste the ID into the WordPress plugin settings panel under "Settings," then "Google Tag Manager," and "General."
Method 4: Synchronize Google Analytics with the server
The final installation method takes place on your server. Google Analytics has a default cache duration (temporary storage) of 2 hours. If the data is modified, users will see the latest updates instantly. However, changing the cache duration on the server slows down updates. That is why Google does not recommend this method.
However, it does offer some benefits. It reduces external HTTP requests and takes advantage of server caching. In other words, it optimizes your site's performance.
Before proceeding, disable the scanning extensions to prevent any potential malfunctions.
Syncing Google Analytics with the server simply involvesadding the GA tracking code to your server. This requires using a plugin called CAOS | Host Google Analytics Locally.
Go to "Settings," then "Optimize Google Analytics," and finally "Basic Settings." Copy and paste your Google Analytics tracking ID into the "Google Analytics Tracking ID" field.
See also: WordPress Interface Guide
Getting the Hang of Google Analytics
Once it's installed, you can start using Google Analytics, but you'll still need to get used to the tool.
Check that Google Analytics is working properly
The verification process takes place in the Google Chrome browser and requires you to install an extension called Tag Assistant on your browser. The installation steps are located under the “Add to Chrome” option. Then, follow the installation instructions.
Next, go to your website using Chrome. You’ll see a new small icon in your browser bar —an upside-down smiley face from Tag Assistant. Click on it and select “Enable.” Refresh the page and click the smiley icon a second time. A green indicator confirms that Google Analytics is working properly.A red indicator means there’s an issue with the setup. In that case, repeat the GA installation process.
Another method of verification involves simulating an analysis of your site. To do this:
- Go to your Google Analytics account;
- Click on the house-shaped icon, which will take you to your dashboard;
- Select the "Real-Time" tab;
- Using a different browser or your mobile device, visit your website and browse a few pages for about a minute.
The appearance of at least one visit in the "GA Real-Time" tab confirms that GA is functioning properly.
Understanding the Google Analytics Home Page
Logging in to Google Analytics takes you to its home page. It displays a list of the sites associated with your GA account. The overview shows some basic metrics, including the number of sessions, the bounce rate, and the conversion rate.
The "Compare to" box compares data from different time periods. The comparison highlights fluctuations in your website's traffic.
The "Reports" tab displays information related to a specific site in your list of websites.
What information does Google Analytics collect?
Google Analytics primarily collects “real-time” data—that is, the various actions taking place on the site at any given moment. It analyzes your site’s “lifecycle”; in other words:
- acquisition (visitor sources);
- engagement (visitor behavior);
- monetization (sales rate);
- customer retention (returning visitors).
It collects demographic data (location, age, gender, etc.) and technical data (type of device used, browser, etc.) from users.
In addition to user data, the tool also collects:
- the number of visitors during the last half hour;
- the percentage of users browsing on mobile devices and PCs;
- the most visited pages;
- the average time spent on each page;
- the visitors' place of origin;
- the bounce rate.
This data covers the behavior of each visitor.
What data should we focus on?
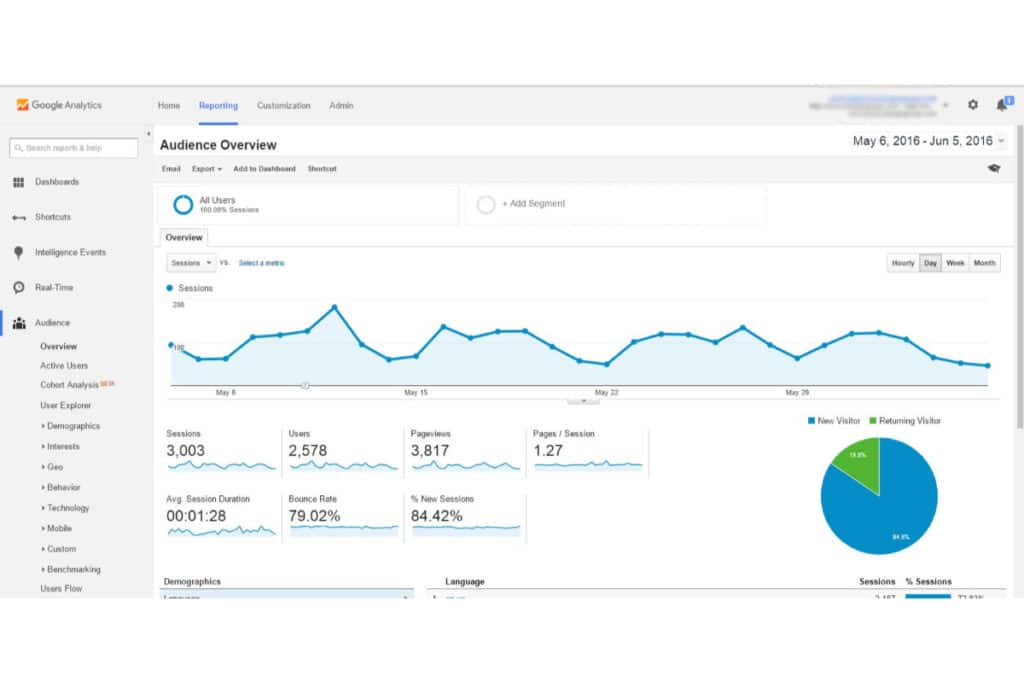
Focus on five metrics: your traffic, traffic sources, devices used, audience, and most-visited pages.You can analyze your traffic in the “Audience” tab, then under “Overview.” You’ll see a graph showing the number of visits over a specific time period.
Traffic sources track where visitors come from. You can view this data in the “Acquisition” tab, then under “Overview.” A chart shows you the channels and their respective percentages:
- Social: users from social media platforms;
- Direct: visitors who entered your address into their browser;
- Organic Search: visitors coming from search engines;
- Referral: Users who are redirected to your site from an external link.
You can view device statistics under the “Audience” tab, then “Mobile,” and finally “Overview.”
The number of visitors is estimated under the “Audience” section, then “Geographic Data.”
To view the most popular pages, go to the “Behavior” menu, then “Site Content,” and finally “All Pages.” A table summarizes the most engaging topics, articles, and pages.
The Use of Google Analytics and the GDPR
As a reminder, the GDPR (General Data Protection Regulation) requires users’ consent before any attempt is made to collect their data for commercial purposes. According to the case law of the Court of Justice of the European Union, GA cannot be used without visitors’ consent. Therefore, it is essential to provide this notice on your Privacy Policy page or in your cookie policy.
Another tip suggests a methodfor anonymizing visitors' IP addresses.
Installing Google Analytics on WordPress: A Summary
This step-by-step guide reveals simple tips for combining the two tools.
Creating a Google Analytics account is the first step. Enter an account name and a content type. Fill in the site property information and verify your account.
The installation process itself offers four methods: using a plug-in (Site Kit by Google, MonsterInsights, or GA Google Analytics), using tracking code, using Google Tag Manager, or syncing Google Analytics with your server. After installation, verify that it’s working properly using the Chrome browser and the Tag Assistant extension.
Please note that use of this tool violates the GDPR, which is why visitors’ consent is required.
What do you think of the setup procedures? Are you ready to use Google Analytics? Let us know your thoughts in the comments.