Redirects are a crucial part of a website’s day-to-day operations, ensuring that users and search engines access the correct URLs on your WordPress site. Any good SEO professional knows that redirects allow you to direct users to pages that have been moved, deleted, or renamed, as well as to correct typos and duplicate URLs. Redirects can also be used to create aliases for URLs or to temporarily redirect to specific events or promotions.
Discover all the redirection methods used by WordPress agencies, each with its own pros and cons. In this article, we’ll explore the various methods available, including using plugins, editing .htaccess files, using WordPress’s redirect_canonical() function, using PHP code such as the wp_redirect() or wp_safe_redirect() functions, and using the Guzzle library. We’ll also outline the pros and cons to help you choose the best option for your site.
Using a Redirect Plugin

There are many redirect plugins available on the WordPress repository, such as Yoast, Redirection and Simple Redirects to manage redirects on WordPress; but for simple and effective use, Rank Math Pro proves to be the ideal solution. At Ingenius, we’ve chosen Rank Math Pro because of its proven reliability and its continuous evolution to meet our SEO needs.
Benefits
- Easy to use thanks to a simple user interface
- Ability to configure bulk redirects
- Ability to automatically track and redirect 404 errors
Disadvantages
- May slow down loading times if the tool is configured incorrectly or uses too many resources
- Requires regular updates to fix bugs and security vulnerabilities
Explanation of the Method
These plugins are designed to simplify the creation of redirects using a user-friendly interface. This means you don't need any knowledge of web development to use this method.
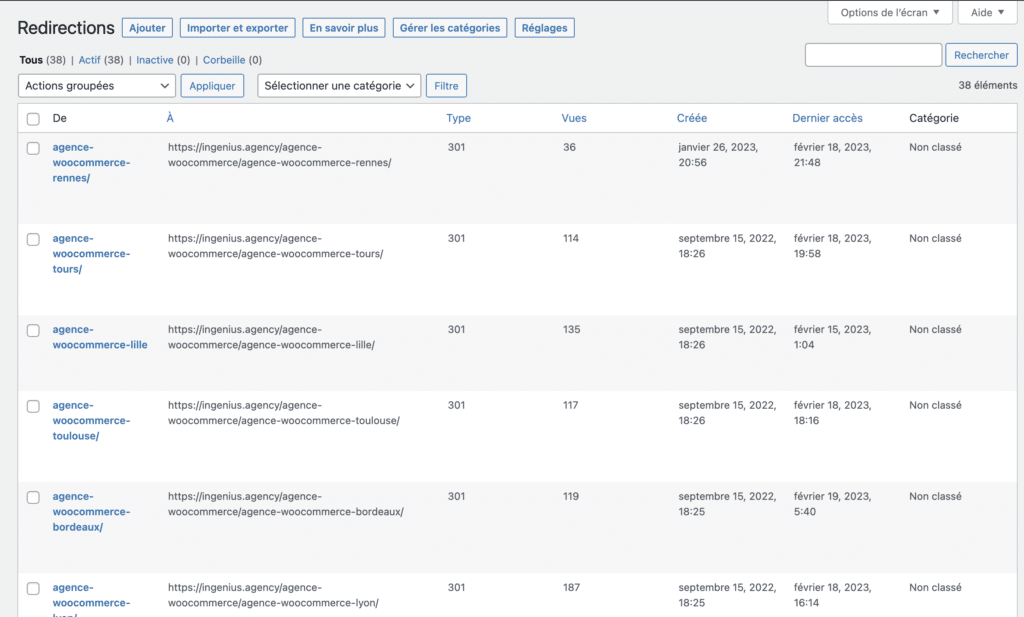
To use a plugin like Rank Math Pro, you must first install and activate the file you downloaded from your account dashboard. Once activated, you can access the plugin’s redirect settings from the WordPress Settings menu. In the settings, you can create new rules by selecting the source page and the destination page. You can also track 404 errors and create bulk redirects from this section.
Examples of Use
Example 1: You have moved a page from one location to another on your site. To prevent users and search engines from encountering a 404 error, you can use a redirect tool to redirect all requests for the original URL to the new URL.
Example 2: You've created a limited-time promotion for your site and want to redirect users to a specific URL when they click on a promotional link. You can use a plugin like Rank Math to set up the redirect.
Editing .htaccess Files
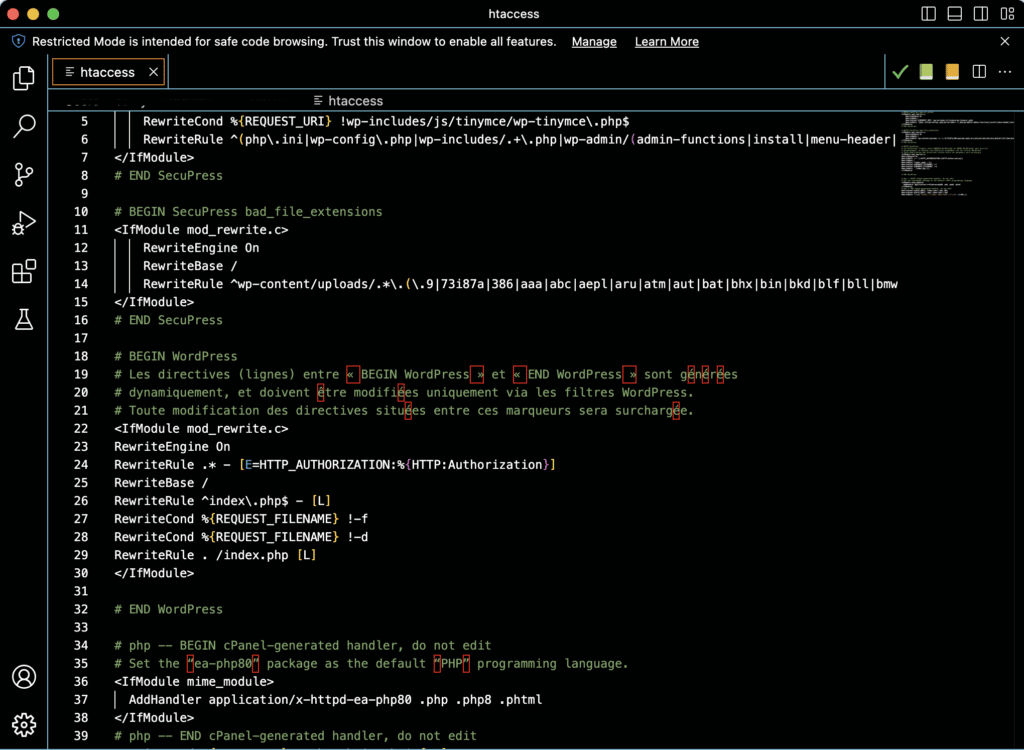
.htaccess files are Apache configuration files that can be used to perform redirects. To use this method, you must have access to your site's .htaccess file and have knowledge of URL rewriting and Apache directives.
Benefits
- Ability to configure advanced redirects
- Better performance than plugins
Disadvantages
- Requires knowledge of URL rewriting and the use of Apache directives
- May cause security issues if redirects are configured incorrectly
Explanation of the Method
The .htaccess file is used to configure Apache settings for a specific website. By using the appropriate Apache directives, you can use the .htaccess file to create redirects for your website's URLs. This method can be faster and more efficient than using plugins, since the redirects are handled directly by the server.
For this to work, you need to access your site's .htaccess file via an FTP client such as FileZilla or by using your hosting provider's file editor. Once you have access to the .htaccess file, you can use Apache directives to create redirects. For example, to redirect one URL to another, you can use this directive:
"Redirect 301 /oldpage.html /newpage.html"It is important to check the syntax and test the redirects before saving and uploading the file, because a syntax error can cause problems for your site. It is also important to save a copy of the file before making any changes, in case you need to undo them.
Examples of Use
Example 1: You have renamed a page on your site and want to redirect all requests for the old URL to the new one. You can use this directive in the .htaccess file to redirect users to the new URL.
"Redirect 301 /ancienne-page.html /nouvelle-page.html"Example 2: You want to redirect all requests for a subfolder to another subfolder. You can use this directive in the .htaccess file to redirect all requests for the subfolder to the new subfolder.
"RedirectMatch 301 ^/ancien-sous-dossier/(.*)$ /nouveau-sous-dossier/$1"Using PHP Code
It is possible to use PHP code to set up redirects on a WordPress site. This requires knowledge of PHP programming and can be more complex than using a plugin or making changes to the .htaccess file. However, it allows for greater flexibility and more advanced redirects.

Benefits
- Ability to configure advanced redirects
- Better performance than plugins
Disadvantages
- Requires knowledge of web development to write and implement the code
- May cause security issues if redirects are configured incorrectly
Explanation of the Method
Using PHP code allows for greater flexibility and more advanced redirects. This requires knowledge of PHP and can be more complex than using a plugin or making changes to the .htaccess file. This type of redirect is generally used for specific cases and requires an understanding of URL structure and programming logic.
To use PHP code, you must add custom code to a PHP file in your theme or to a custom plugin. There are several PHP functions commonly used to perform redirects, such as ` header() ` and ` wp_redirect()`.
Examples of Use
Example 1: You want to redirect users to a specific page based on their user role. You can use the following PHP code to check the current user's role and redirect them to the appropriate URL:
if(current_user_can('subscriber')) {
   wp_redirect(home_url('/page-pour-subscribers/'));
   exit;
} elseif(current_user_can('editor')) {
   wp_redirect(home_url('/page-pour-editors/'));
   exit;
}
Example 2: You want to redirect users to a specific page after they submit a form. You can use the `wp_redirect` function to redirect users to the thank-you page after they submit the form:
wp_redirect(home_url('/thank-you-page/'));
exit;
Using the wp_redirect() function
The wp_redirect() function is used to redirect users to another page or website. This function is used to redirect users to a different URL after a specific action, such as submitting a form or logging into an account.
Benefits
- Ability to easily redirect users to another page
- Better performance than plugins
Disadvantages
- Requires knowledge of web development to customize this feature
- May cause security issues if redirects are configured incorrectly
Explanation of the Method
The wp_redirect() function is typically used to redirect users after a specific action, such as submitting a form or logging into an account. It is important to note that this function must be called before any content is displayed; otherwise, it may cause errors.
To use the wp_redirect() function, you must add code to a PHP file in your theme or to a code injection tool. The function takes as arguments the URL of the page or site to which you want to redirect users, as well as an optional HTTP status code (by default, this is a 301 status code).
Examples of Use
Example 1: You want to redirect users to a thank-you page after they submit a form. You can use the wp_redirect() function to redirect users to the thank-you page after they submit the form:
wp_redirect(home_url('/thank-you-page/'));
exit;
Example 2: You want to redirect users to a specific page after they log out. You can use the wp_redirect() function to redirect users to the logout page after they log out:
wp_redirect(home_url('/logout-page/'));
exit;
Using the wp_safe_redirect() function
The wp_safe_redirect() function is used to securely redirect to another page or site. This function is similar to the wp_redirect() function, but it verifies that the redirect URL is on the same domain as the current site, which prevents malicious redirects.
Benefits
- Verify that the redirect is to an approved site before redirecting the user
- Better performance than plugins
Disadvantages
- Requires knowledge of web development to customize this feature
- May cause security issues if redirects are configured incorrectly
Explanation of the Method
The wp_safe_redirect() function is a WordPress function similar to the wp_redirect() function, with a feature that prevents malicious redirects. It is important to note that, as with the previous function, this one must also be called before any content is displayed; otherwise, it may cause errors.
As with the previous function, you must add code to a PHP file in your theme or in a code-injection plugin. The function takes as arguments the URL of the page or site to which you want to redirect users, as well as an optional HTTP status code. The wp_safe_redirect() function also verifies that the redirect URL is on the same domain as the current site, which prevents malicious redirects.
Examples of Use
Example 1: You want to redirect users to a thank-you page after they submit a form. You can use the wp_safe_redirect() function to redirect users to the thank-you page after they submit the form:
wp_safe_redirect(home_url('/thank-you-page/'));
exit;
Example 2: You want to redirect users to a specific page after they log out. You can use the wp_safe_redirect() function to redirect users to the logout page after they log out:
wp_safe_redirect(home_url('/logout-page/'));
exit;
Using the redirect_canonical() function
The WordPress `redirect_canonical()` function is used to manage redirects for duplicate URLs. It redirects users to the canonical version of a URL—that is, the one that has been designated as the official version of a page.
// Redirige l'utilisateur vers l'URL canonique
add_action( 'template_redirect', 'redirect_to_canonical' );
function redirect_to_canonical() {
  // Vérifie si l'URL actuelle est canonique
  if ( !is_singular() && !is_home() && !is_archive() && !is_category() && !is_tag() && !is_author() && !is_search() && !is_404() ) {
    // Renvoie l'URL canonique
    redirect_canonical();
  }
}
Benefits
- Automatically redirects duplicate URLs to the canonical URL
- Better performance than plugins
Disadvantages
- Requires knowledge of web development to customize this feature
- May cause security issues if redirects are configured incorrectly
- May negatively impact the customer experience (in the context of e-commerce)
Explanation of the Method
The WordPress `redirect_canonical()` function is designed to handle redirects for duplicate URLs. It allows you to redirect users to the canonical version of a URL. This function is used automatically by WordPress, but can be customized to meet the specific needs of your site.
To use the `redirect_canonical()` function for your redirects, you must add custom code to your `functions.php ` file or to a custom plugin. You can use the ` redirect_canonical()` function to redirect URLs with parameters, URLs with subdirectories, and URLs with typos by using the appropriate arguments.
It is important to note that the `redirect_canonical()` function does not handle redirects for pages that have been moved, deleted, or renamed. To handle these types of redirects, you will need to use another method, such as a plugin or changes to the `.htaccess` file.
Examples of Use
Example 1: You want to redirect users to the canonical version of a URL even if it contains unnecessary parameters. You can use the `redirect_canonical()` function with the `strip_qs` argument to remove unnecessary parameters from the URL before redirecting to the canonical version.
Example 2: You want to redirect users to the canonical version of a URL even if they entered a typo in the domain name. You can use the `redirect_canonical()` function with the “trailingslash” argument to handle typos in the domain name and redirect to the canonical version of the URL.
Using the Guzzle Library Method
The Guzzle library is a tool for managing HTTP requests that can be used to set up redirects on a WordPress site. This method requires advanced knowledge of PHP programming and may be more complex than using a redirect plugin or editing the .htaccess file. However, it offers greater flexibility and allows for more advanced redirects.

Benefits
- Ability to configure advanced redirects
- Better performance than plugins
Disadvantages
- Requires knowledge of web development and the Guzzle library to set up redirects
- May cause security issues if redirects are configured incorrectly
Explanation of the Method
Using the Guzzle library to perform redirects allows for greater flexibility and more advanced redirects. This method is used for specific cases and requires knowledge of URL structure as well as an understanding of programming logic.
To use the Guzzle library, you must first install it using Composer or by downloading the necessary files. Then, you can use the library's functions to send an HTTP request and handle redirects.
Examples of Use
Example 1: You want to redirect users to a thank-you page after they submit a form. You can use the Guzzle library to send an HTTP request to the thank-you page and handle the redirection:
$client = new GuzzleHttp\Client();
$response = $client->request('GET', 'https://example.com/thank-you-page/');
$statusCode = $response->getStatusCode();
if ($statusCode === 301) {
    $location = $response->getHeader('location')[0];
    wp_safe_redirect($location);
    exit;
}
Example 2: You want to redirect users to a specific page after they log out of their account. You can use the Guzzle library to send an HTTP request to the logout page and handle the redirection:
$client = new GuzzleHttp\Client();
$response = $client->request('GET', 'https://example.com/logout-page/');
$statusCode = $response->getStatusCode();
if ($statusCode === 301) {
    $location = $response->getHeader('location')[0];
    wp_safe_redirect($location);
    exit;
}
In conclusion, how do you set up a redirect on WordPress?
Redirects are an important part of a WordPress site because they help maintain a seamless user experience and protect SEO on WooCommerce. Take the time to understand how they work to avoid unpleasant surprises and finding yourself wondering,“Why isn’t my site showing up on Google?” There are several methods for setting up redirects in WordPress, including using plugins, editing the .htaccess file, using PHP code and functions such as redirect_canonical() and wp_redirect(), using a specific plugin to redirect 404 pages, using the wp_safe_redirect() function, and using the Guzzle library.
Each of these methods has its own advantages and disadvantages, and it’s important to understand these differences in order to choose the method that best suits your needs. It’s also important to note that you should test and verify redirects to ensure they work correctly and don’t cause infinite loops or other issues. By following the instructions in this article, you should be able to understand the different redirection methods available and use them effectively to improve the user experience and protect your WordPress site’s SEO.
And if, despite all this information, you’re still drowning in a sea of chaotic redirects, ourSEO subscription service is perfect for you. Our teamof WordPress experts will take full control of your entire strategy, including all the redirects that need to be set up!
What about you? Do you have any other tips for setting up a redirect in WordPress? Share your strategies with us in the comments—we’d love to discuss them with you!