You've chosen WordPress to create your website, but you feel lost in your first steps. Follow our comprehensive guide to understanding the WordPress interface.
First steps on the WordPress administration
The login screen
The login screen is the first page you see when you try to access the WordPress admin dash board by going to the following URL: https://mon-site-internet.fr/wp-admin (my-internet-site.co.uk should be replaced by your domain name).
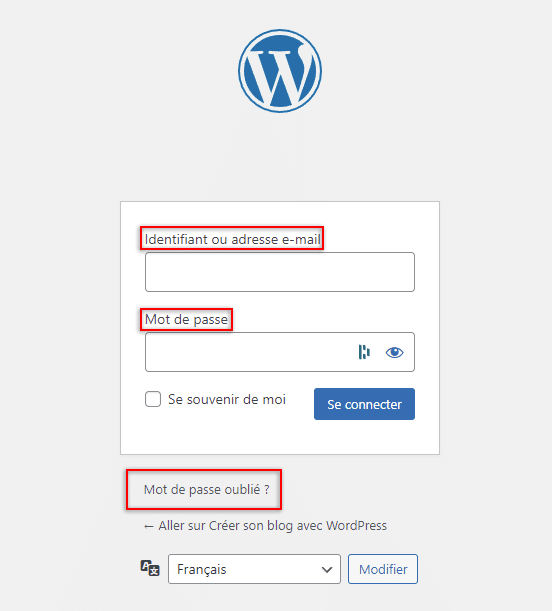
There is nothing complicated here. A clear and simple interface to enter your user ID or e-mail address and the associated password to connect. If you forget your password, the Forgotten Password link will reset it.
The dashboard
Once you have logged into your WordPress website, you are taken to its dashboard. From here, you can access all the features of WordPress in a few clicks. Depending on the themes and plugins you have activated, you can customise the page and change its appearance. Using the Screen Options button at the top right of the interface, you can show or hide items and arrange them with simple drag and drop. Please note that the content offered varies depending on the plugins installed on your site.
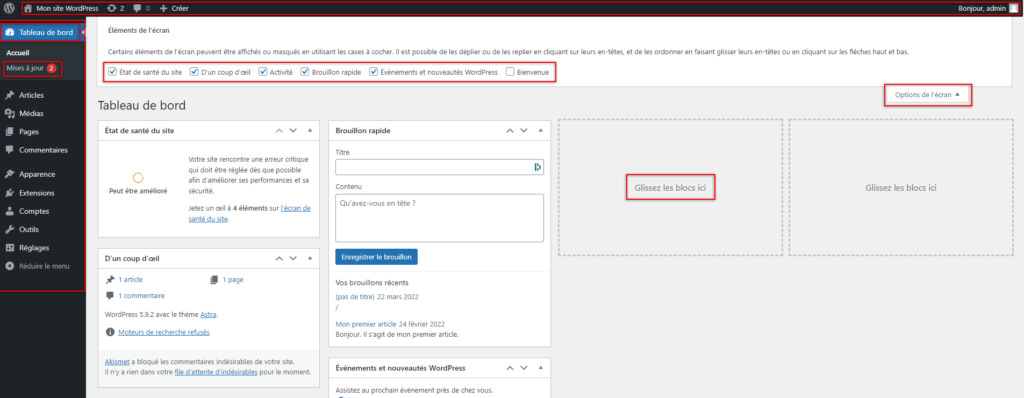
At the top of your screen is the administration bar. Present when you are logged into your WordPress site, it provides quick access to creating posts or pages, commenting on your site, making updates and editing your profile. With just one click on Go to Site, you can switch to the public area of your website to see your recent updates.
Finally, there is a side menu on the left-hand side of your website to access the different sections and features of your website. Note that depending on which plugins are enabled, the shortcuts present may vary. Open by default when you are on the WordPress dashboard, the Updates sub-tab takes you to a page dedicated to updating WordPress, its themes and plugins.
Managing your WordPress content
The articles
WordPress is based on two main types of content: posts and pages. Both rely on building and formatting content for publication on your WordPress website.
Unlike pages, posts are used to create temporal and chronological content by having a specific publication date assigned to them. You can manage them in the Posts category of the WordPress administration menu. This is where you canadd, edit, and remove posts from your site, as well as various categories and tags.
All articles
All articles provides an overview of the articles written on your site and present in its Blog or News section. On this page, you can write new content with the Add button, manage or edit articles already created via options that are displayed when you move your cursor over the line of an article. A search field, filters and grouped actions (edit, trash) are also there to manage your content more efficiently.
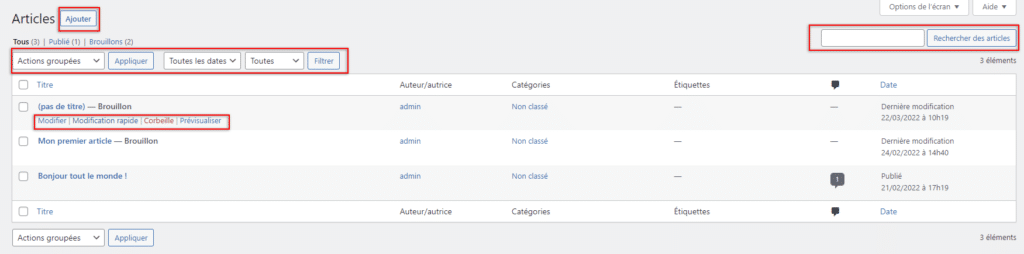
Included in a sub-menu displayed under each article title on mouse-over, the Quick Edit feature makes it possible to modify some of the parameters and contents of articles without having to change pages. In concrete terms, you can modify :
- the title;
- the URL (or slug);
- the date of publication ;
- the categories and labels in which an item is classified;
- and finally the visibility status or degree of publication (published, private, awaiting review, draft or password protected).

Add an article
When you click Add to write a new post to your blog or news, WordPress propels you into its "block-based" editing interface. Launched in December 2018, the Gutenberg editor turns each element of your post into a block to be assembled with others: paragraph, image or even video. To add one, simply type "/" or click on the "+" icon, both present in the interface, to select the type of block you want. Feel free to play with their combination to create content that stands out in terms of form and structure.

The right-hand column of the article writing interface is divided into two tabs. The first one, Block, is open by default and allows you to play with different parameters related to the appearance of your placed content:
- text or background colour ;
- text and typography settings ;
- advanced settings such as adding HTML anchors or additional CSS classes.
The second tab, Article , sets the technical parameters of your article. In addition, you can :
- set the visibility of your content to public, private or password protected;
- change the publication format (standard, image, link, video, etc.);
- assign one or more categories and labels ;
- set up a highlighted image used as a preview in your list of items and as a header;
- write an excerpt that can be taken up and displayed as a preview on your blog;
- and allow comments, pings and backlinks.
Categories and labels
Located in Posts > Categories and Posts > Tags respectively, these two WordPress features allow you to create categories and tags and assign them to posts. Here, the goal is to classify and link different posts so that when you read them, similar content is suggested, as well as structuring the themes of the blog.
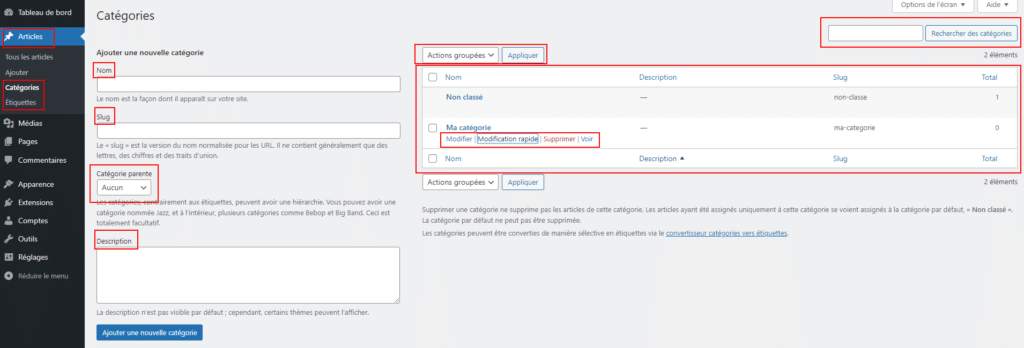
Creating new categories and tags requires a name, a slug (or URL) and a description. Like a family tree, categories can be prioritised by assigning a parent category to those of your choice.
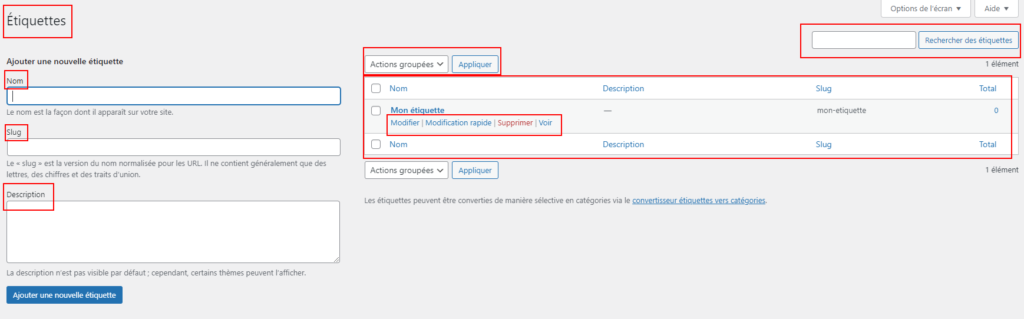
Finally, each of these two pages has a list of all the categories and tags you've created to make it easier to manage and edit them. Just like posts, you can use this interface to quickly edit, modify, delete, or view your various categories and tags on your WordPress site.
The pages
Unlike posts, which are based on temporality, WordPress pages are used to create static, permanent content that will last over time.
Just like the articles, the management of the pages of your website has an interface in the category Pages of the side menu. All pages reference all the pages designed that you can view, edit, quickly modify or delete in a few clicks. For multiple actions, check the box to the left of the title of your pages to select the ones you want and make your various changes using the Grouped Actions drop-down menu.
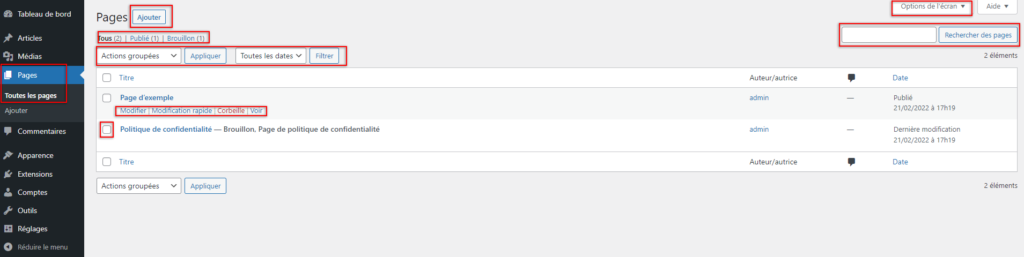
Is your list overflowing and spanning multiple tabs? The WordPress interface has a search field and a date filter to help you find your way around. By going to the Screen Options at the top right, you can show or hide some items:
- the Author, Comments and Dates columns;
- the number of items per page (20 by default);
- and the display mode in Compact or Extended View.
Of course, just like the dashboard, these elements may vary depending on your theme and the plugins installed on your website.
The default editing interface for pages will not change from that for posts. Again, you will need to assemble a number of blocks with the Gutenberg editor to create pages that look just like you do. If you plan to use apage builder plugin such asElementor or Divi, you will abandon Gutenberg in favour of a new, much more complete and customisable editor. Feel free to consult our checklist of WordPress plugins to get you started to learn more about them!
Media
The media library in the WordPress administration is a collection of media uploaded to your site. The library is capable of hosting several types of media, such as :
- images (.jpg, .png, .gif, .jpeg and .ico);
- audio files (.mp3, .wav, .ogg, .m4a);
- videos (.mp4, .m4v, .avi, .mpg, .ogv, .3gp, .3g2, .mov and .wmv);
- PDF files;
- or Word, Excel and PowerPoint documents.
Add media
For the security of your site and to avoid saturating its database, WordPress sets a maximum upload size. In concrete terms, if the size of your files exceeds the set limit, 40 MB by default, you will not be able to upload 41 MB folders on this interface. To get around this limit, there are two solutions: either increase the maximum upload size, or use FTP (File Transfer Protocol). Note that this second option will probably be necessary for the installation of premium themes or plugins.
If you are interested in the topic, let us know in the comments! Based on your feedback, we'll put together a tutorial article about it 😉
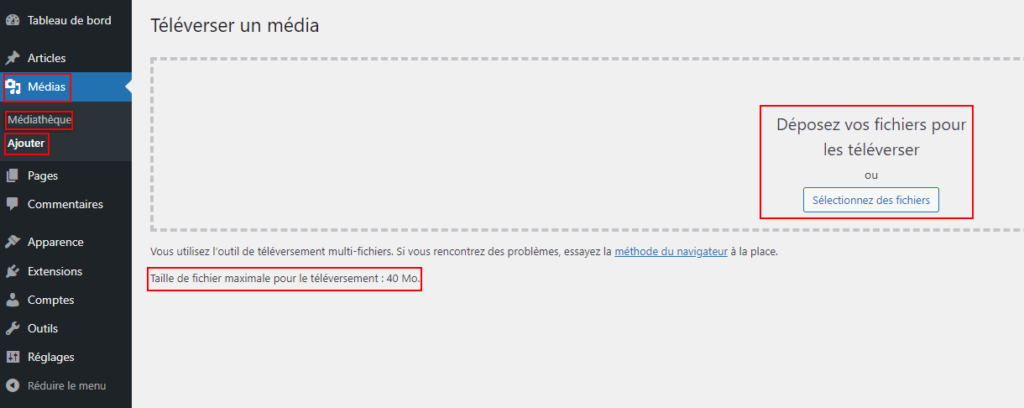
To add files to your WordPress site, simply go to either Media > Media Library or Media > Add. On either of these two pages, you will be able to select files from your computer or drag and drop them. The only difference is that the Media Library lists all the documents you can upload to your website.
The Media Library
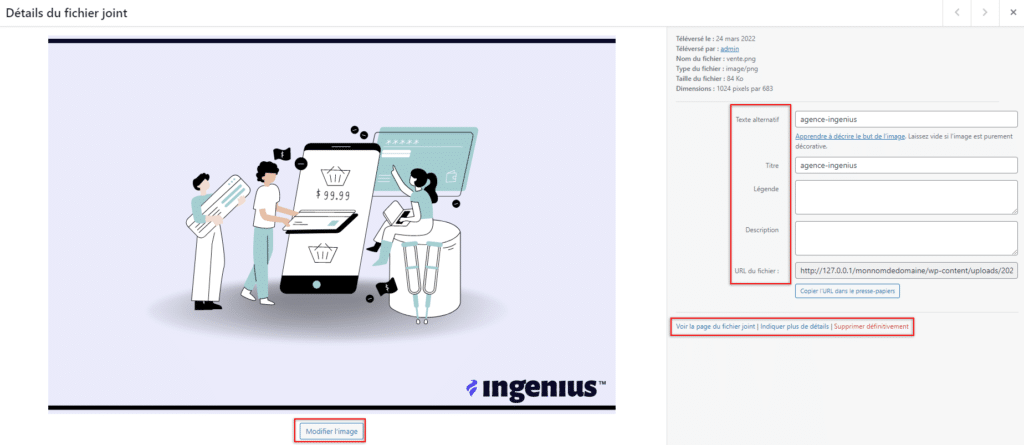
As mentioned earlier, all the media uploaded to your WordPress website are grouped together in the Media Library. By default, these are displayed as a grid. Depending on your preferences, this presentation can be changed to display the items in a list by clicking on the corresponding icon at the top left of the interface. In addition, using the drop-down menu next to it, it is possible to filter your files by type and by date. As with the articles and pages, a search bar is available to find a specific file by name.

Once a media item is selected, a window appears in which it is possible to retrieve the URL of the file and to specify metadata that will be linked to the item. This metadata includes an alternative text to describe the purpose of an image, a title, a caption and a description. It is more than recommended to add at least one alternative text to each file. These data optimisations allow your content to be better referenced by search engines. It is therefore essential, in terms of SEO, to focus on this metadata which could well propel your various files and images into the first search results.
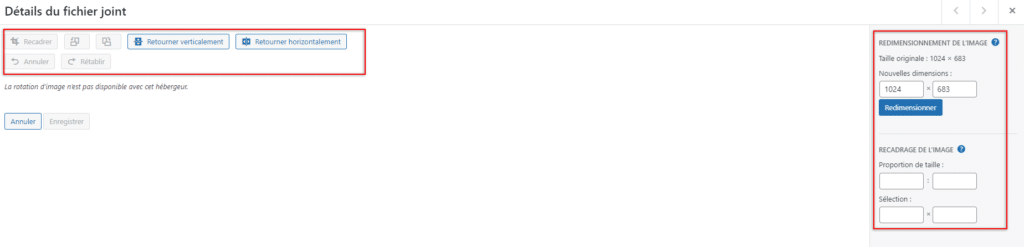
The media library has a quick image cropping system to assign new, suitable dimensions. To do this, click on the image you wish to crop, specify the crop values, and finish with Save.
Although the Media Library features are simple, they are nonetheless effective. To take it a step further and expand the possibilities, there are various plugins to better organise, sort and categorise your files. Don't hesitate to have a look at the WordPress.org library to see what the WordPress developer community has to offer.
The comments
Comments are available under all of your posts, if you have them enabled, and allow your readers to discuss and give feedback on the content posted on your blog or news. Comments are listed in the Comments tab of your WordPress administration interface.
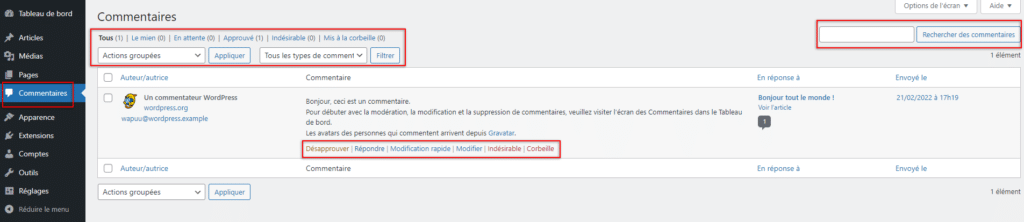
Just like articles, pages and media, comments are visible in a listing where they can be easily managed:
- respond to it;
- edit them quickly without leaving the list of all comments;
- change them;
- put them in the undesirable ones ;
- or in the basket.
If your comments are subject to approval or pre-approval, a single click with the Unapprove or Approve function will moderate them.
Finally, a filter and search system similar to the article interface will organise comments according to your criteria, a role also fulfilled by the All, Pending, Approved, Unwanted and Trashed tabs.
As you will have noticed, managing the content of your WordPress website involves juggling different windows and interfaces. While at first glance all of these elements may seem confusing, we want to reassure you. With a little practice, you'll become a WordPress pro! It's not rocket science. This is one of the main strengths of WordPress, which makes it the most popular content management system in the world.
Defining the look and feel of your WordPress site
Themes
A WordPress theme is a set oftemplatefiles and CSS style sheets that determine the graphical appearance of your website.
All themes installed on your WordPress site can be viewed in Appearance > Themes. By default, three themes are installed (Twenty Twenty, Twenty Twenty-One and Twenty Twenty-Two), but you can install as many as you like by clicking on the Add button at the top of the management interface. This will take you to a library that references all the themes available on WordPress.orgthe official WordPress website.
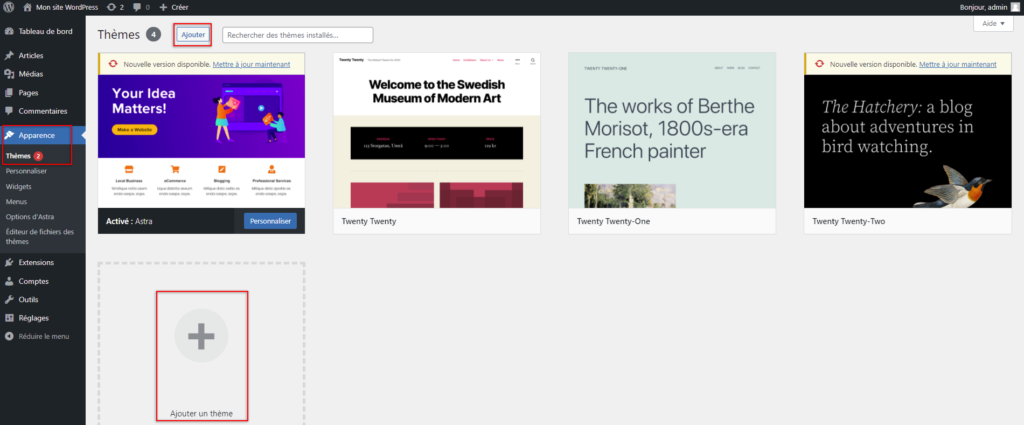
If you find one of them through the search field, a simple click on the Install button and then Activate when hovering over one of the maps will be enough to install the chosen theme on your WordPress.

Please note: only one theme can be active at a time on your WordPress site, so choose carefully. To help you in your final decision, before installing a theme, you can view its rendering with the Live Preview button.
Finally, it is possible, as is often the case with premium themes, that they are not available in the WordPress library. If this is the case, you probably have the files of your theme purchased on a specialized merchant site. To install and activate it, simply upload it by adding its .zip folder to your site directly on the management interface.
Customisation
Once you have found and activated a WordPress theme, it is configurable and customisable through its own customisation interface in Appearance > Customise. This is where you can enable and disable the various modules of your theme, and change appearance-related settings such as the fonts used or the colour of your text. You also have access to layout features, menus, and widgets.
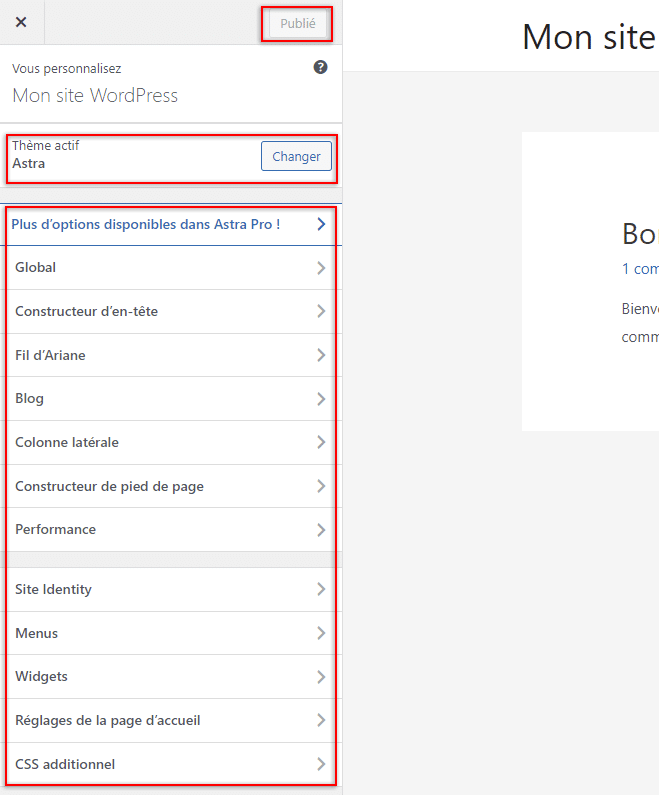
The options available vary depending on the WordPress theme used. In most cases, the premium version of a theme will unlock new customisation possibilities that were previously unavailable.
Feel free to test and combine several settings to design your website to your image. All changes made can be previewed live before they are saved and put online.
Widgets
Widgets are modules that fit into predefined areas of a WordPress site, usually in a sidebar or footer. They are managed in Appearance > Widgets.
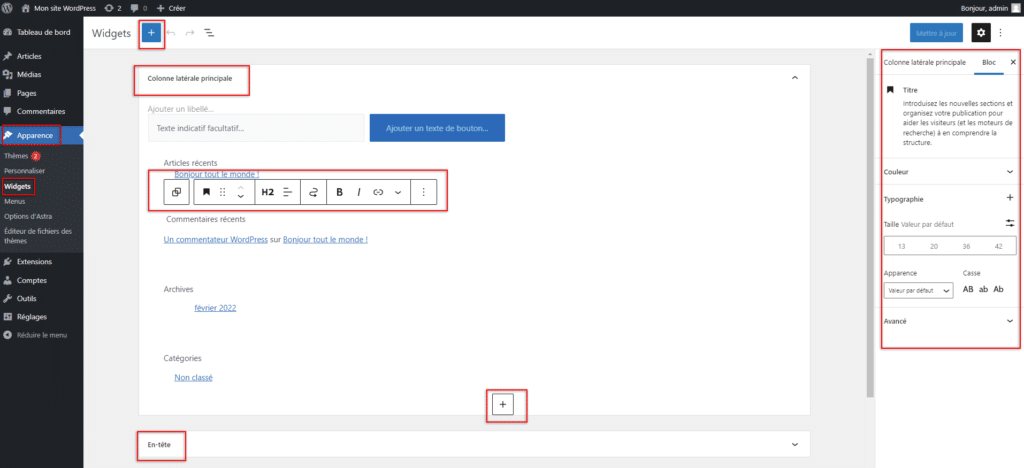
Like posts and pages, widgets can be configured using the Gutenberg editor's blocks to place content (image, text, gallery, etc.) in different locations on your site:
- Main side column ;
- Header ;
- Section 1 of the footer ;
- and section 2 of the footer.
To place a widget in one of these areas, click on the '+' button to access a list of blocks. Any modification of the widgets already in place is done directly in the space of a selected block; the options proposed depend on the type of block (text, image, list, quote, etc.). Among the types of modules that can be used, you will find the widgets that are native to WordPress, available by default, and those that have been added thanks to the plugins installed on your site.
Menus
WordPress menus are crucial elements of your website. As the entry point for navigation, menus give a first overview of the content offered to visitors. They must therefore be structured and clear. Overcrowded menus that lose visibility will tend to scare off your potential prospects and future customers.
Once in Appearance > Menus, you have access to two tabs: Edit Menus and Manage Locations.

The first tab allows you to modify the menus on your WordPress site or create new ones. The interface is divided into two columns: Add Menu Items and Menu Structure. In the left-hand column, click the Add to Menu button to add different items to your menus:
- of the pages ;
- articles ;
- personalized links ;
- and categories.
In the Menu Structure column, you can organize your items, edit them, change their order, create sub-menus or adjust their location by simply dragging and dropping:
- main menu ;
- secondary menu ;
- off-screen menu ;
- logged-in account menu ;
- and footer menu.
By going to the Screen Options at the top right of the interface, you can see several advanced menu properties. By default, to gain visibility and be more accessible to the beginner, WordPress hides a certain number of parameters such as the title attributes or the CSS classes. You are free to choose which ones to display in order to optimise your website's menus as much as possible.
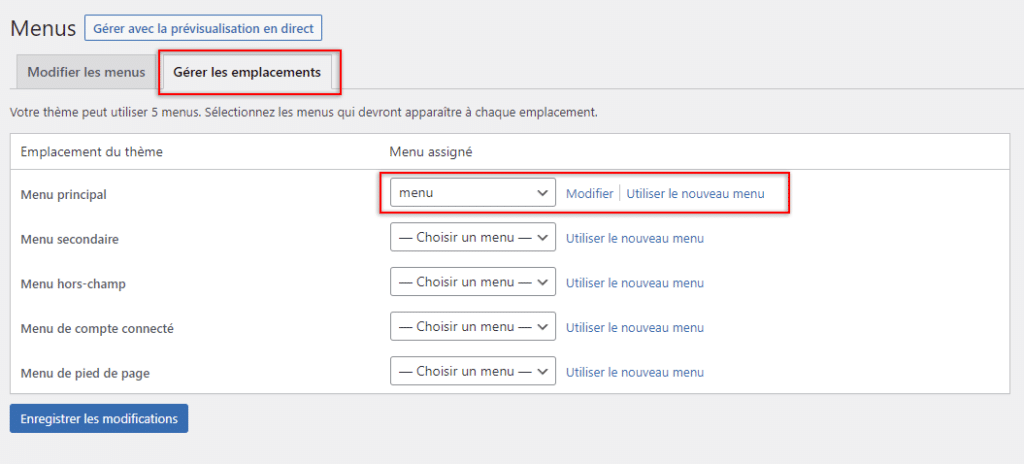
The second tab of the menu management interface allows you to set the location of the menus.
These are all items found in the Edit Menus > Menu Settings tab, in a more compact form. To assign or change the menu for a location, use the drop-down list. If you want to create a new one, click on Use New Menu which will take you to the creation interface, as will the Edit option to revise or improve it.
Extending the functionality of WordPress with plugins
By definition, a plugin is an additional extension for a WordPress site that extends its functionality and adds new features.
The plugins installed on your website can be viewed in Extensions > Installed Extensions in the side menu. From this list, you can activate or deactivate the plugins of your choice, delete them, update them and access their settings.
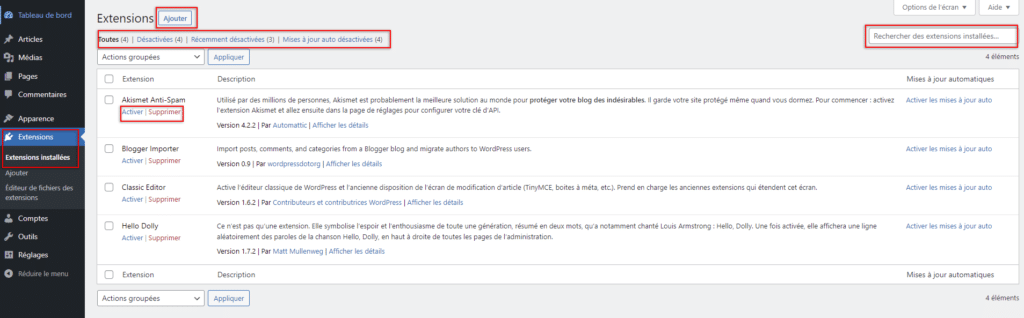
To add a plugin, click the Add button at the top of the Installed Extensions page or go to the Extensions > Add sub-tab.

Adding plugins takes you to the WordPress Extension Directory. This is where all the plugins in the official WordPress website and where you can install and activate the ones you want. To do this, click on :
- Search for (1) a specific plugin with the bar and the search options ;
- Use the categories Highlighted, Popular, Recommended and Favourite (2 ) ;
- Browse the plugin library (3);
- Install and activate the chosen plugins (4).
The other way to install a plugin without going through the WordPress extensions directory is to "upload" (or download) the .zip files of your extensions to your WordPress site (5). This procedure is particularly useful for installing plugins that are not referenced by WordPress or for installing earlier versions.
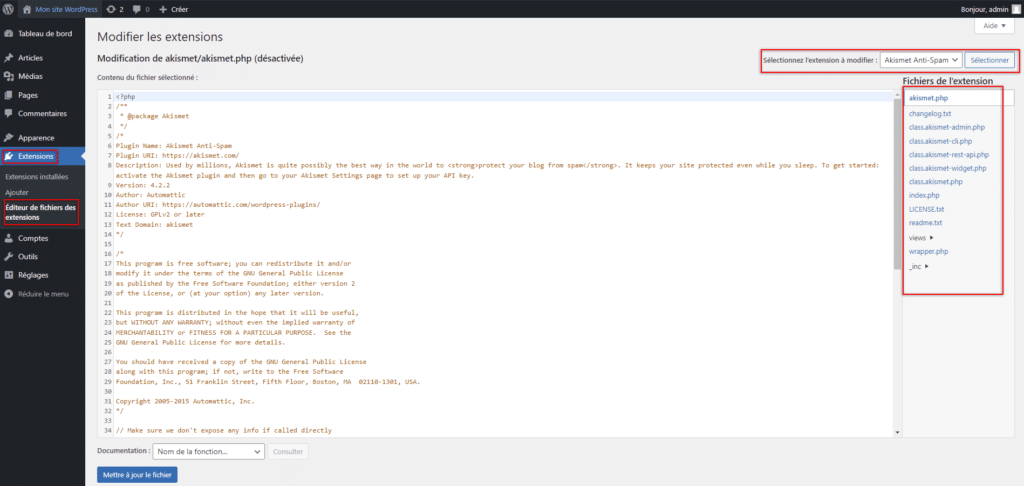
Finally, the WordPress extensions interface has a file editor accessible under Extensions > Extension File Editor. Through this link, you can edit all of the PHP and CSS files on which your plugins are based. If you do not have any knowledge of web programming, it is very likely to alter the proper functioning of your website. So, seasoned users beware!
Manage your users
WordPressuser management completes the sidebar by adding three sub-tabs: All Accounts, Add and Profile.
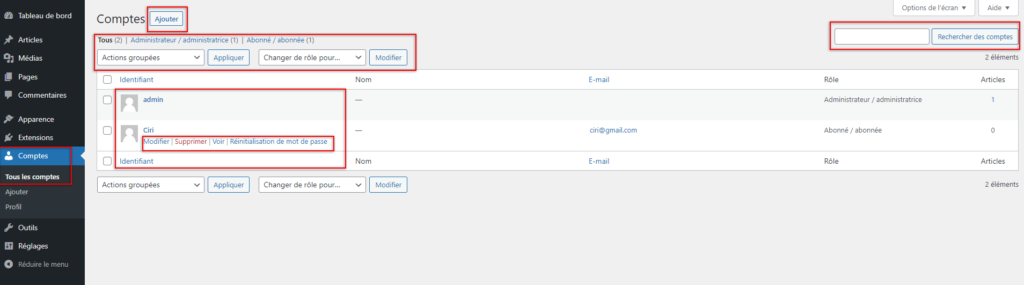
All Accounts lists the registered users of your WordPress website with the ability to manage their account or reset their password if they forget it. As with posts and pages, the interface provides filtering and search options to target an account more effectively. In addition, checking multiple accounts at once allows for bulk deletion or password change actions.

To create new user accounts, go to Accounts > Add and fill in the various fields provided, making sure to include a username and e-mail address. We recommend that you use random password generation by default for greater security of your accounts. Complete the creation form by indicating a role for the new user (subscriber, contributor, author, editor or administrator).
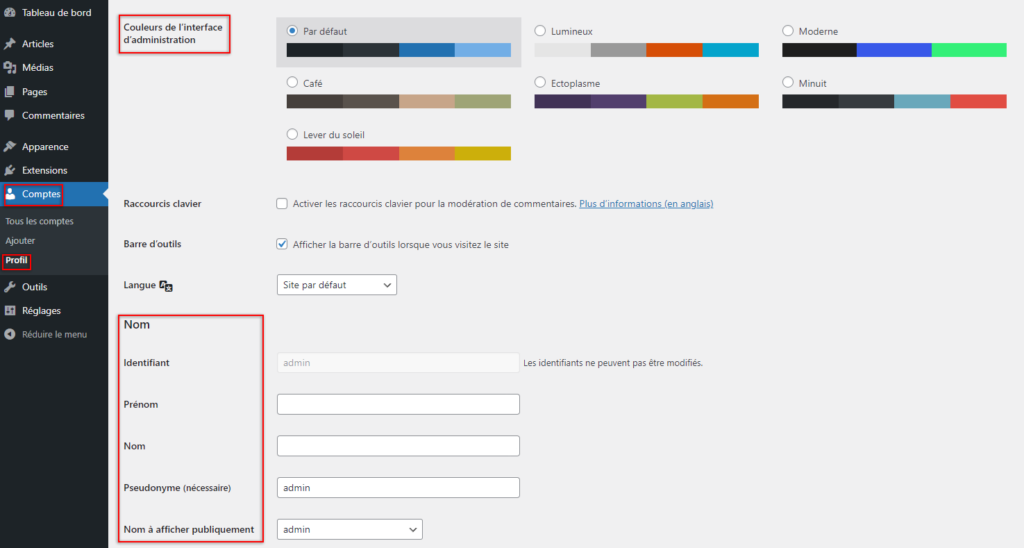
Finally, the last tab, Accounts > Profile, is used to configure your user profile by entering optional personal information (first name, last name, biography, etc.), to set a new password or to change the colours of your administration interface.
Tools and settings
The Tools and Settings tabs in the WordPress sidebar are real toolkits, respectively.
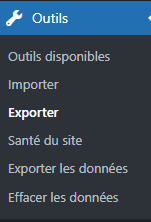
The former has an arsenal of options that could well facilitate the management of your website:
- Import articles and comments from other websites or RSS feeds;
- Export your website content (articles, pages, media) as an XML file;
- Monitor the health of your site;
- Exporting data to comply with RGPD laws and regulations;
- Delete the data related to a user.
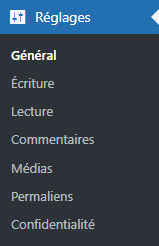
The second tab, Settings, contains the WordPress settings. All of its options are categorized into sub-tabs controlling the various sections of a WordPress site:
- General: title and subtitle of a site, URL, e-mail address, language, date and time zone as well as the opening of registrations for everyone;
- Writing: default article category and format, e-mail publication and update services;
- Reading: elements displayed on the home page, number of articles on the pages, configuration of the display of publications and control of the visibility of the site for search engines;
- Comments: moderation rules and settings for comments under publications;
- Media: determining the size of the images in the Media Library ;
- Permaliens: management of URL format and prefix of categories and tags ;
- Privacy: setting of the privacy policy and related pages.
Depending on the plugins installed, new sessions will be added to those already existing by default. Do not hesitate to consult the documentation provided by the developers of these extensions to obtain detailed answers on the interest of the new settings that appear with their installation.
It's not rocket science
Although it can be confusing at first, the WordPress interface is easy to get to grips with after a few minutes of navigating the different sections. It is constantly evolving with regular updates and plugins installed, so don't hesitate to be curious and take a look at the new options available while keeping up with the latest news.
After all, it is because of the simplicity and accessibility of its interface to any user, regardless of their profile, that WordPress has built its reputation as the best CMS for designing websites.
What was your reaction when you first started using WordPress?